I'm on fire with makeup looks lately, so don't resent me if you'll have to see many makeup looks on my blog in next few days and weeks.
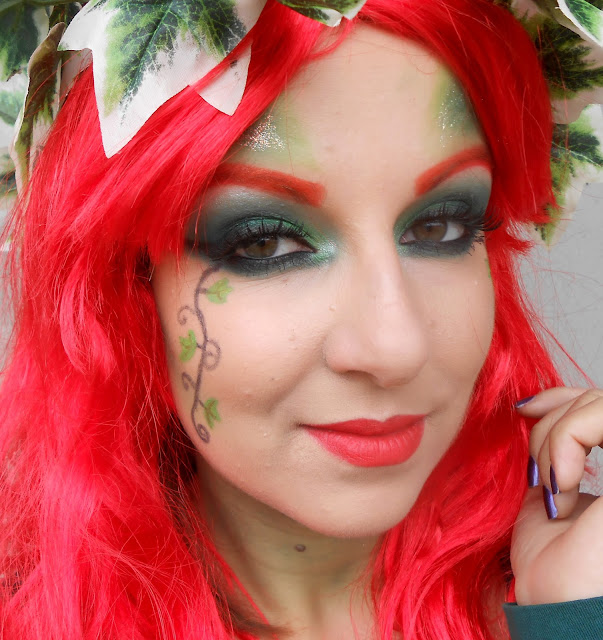
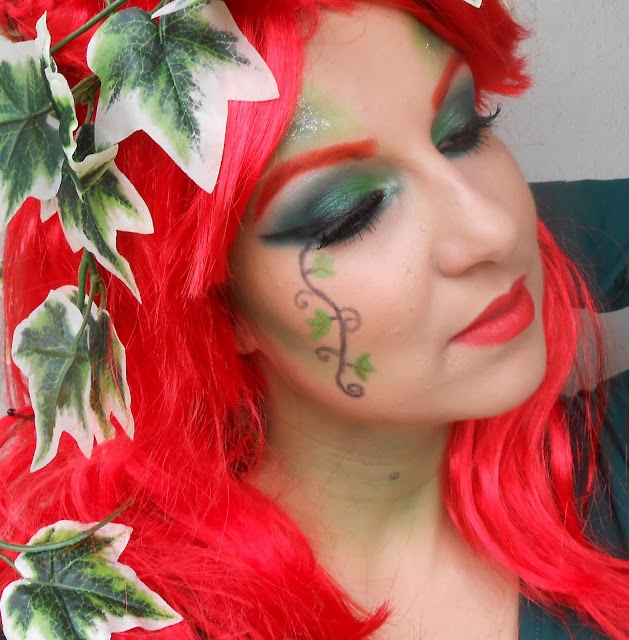
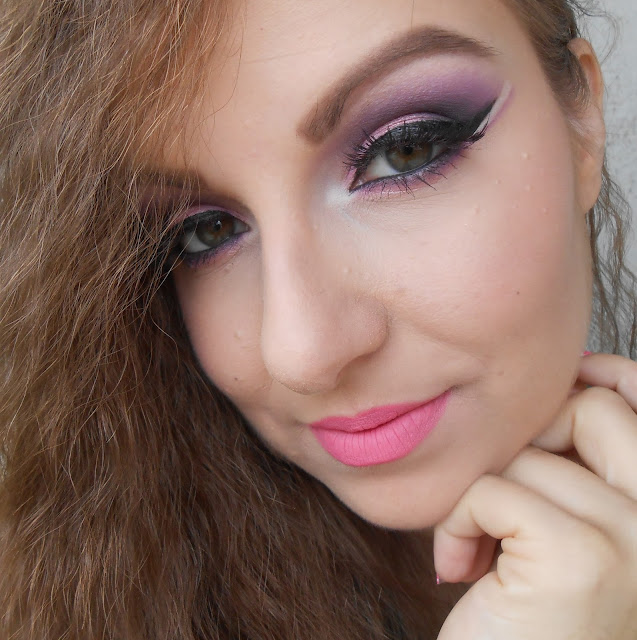
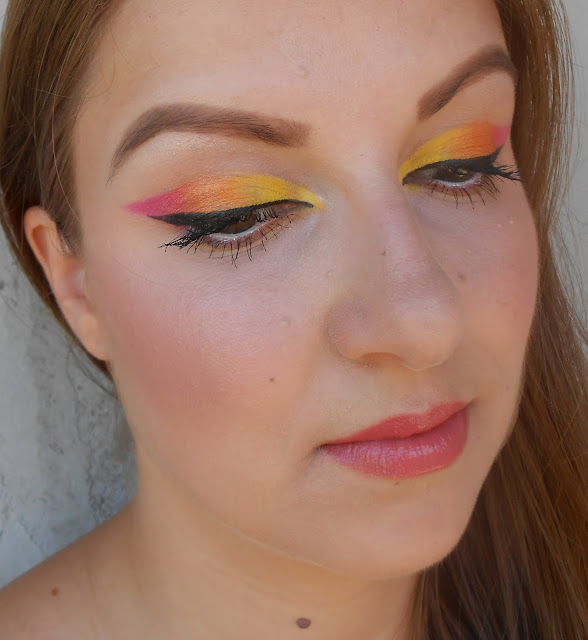
Our favourite characters from Despicable Me got their own movie this year, and I was so eager to see it that I dragged my darling, who is not a fan of animated movies, to the cinema. I enjoyed the movie, and already back then I got the idea to create a makeup look, inspired by Minions. Yellow and blue, those are the colours of little creatures Minions. I actually had a bit crazier look in mind, but it didn't really come out as I imagined, so I did something simpler, but pretty anyway.
Our favourite characters from Despicable Me got their own movie this year, and I was so eager to see it that I dragged my darling, who is not a fan of animated movies, to the cinema. I enjoyed the movie, and already back then I got the idea to create a makeup look, inspired by Minions. Yellow and blue, those are the colours of little creatures Minions. I actually had a bit crazier look in mind, but it didn't really come out as I imagined, so I did something simpler, but pretty anyway.

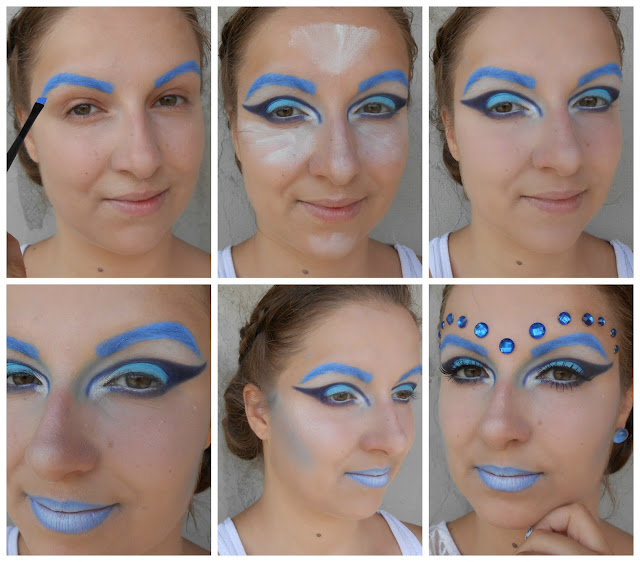
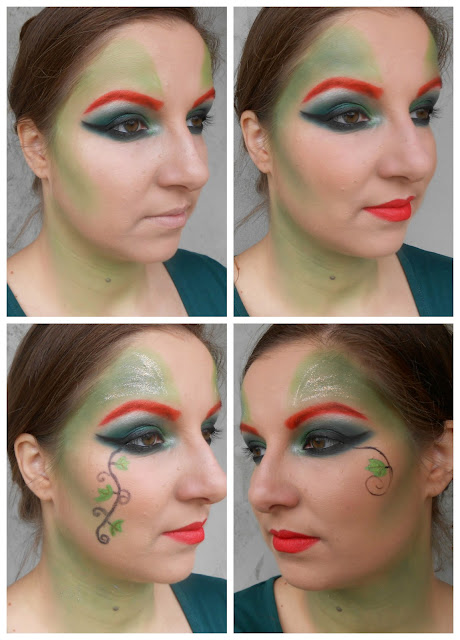
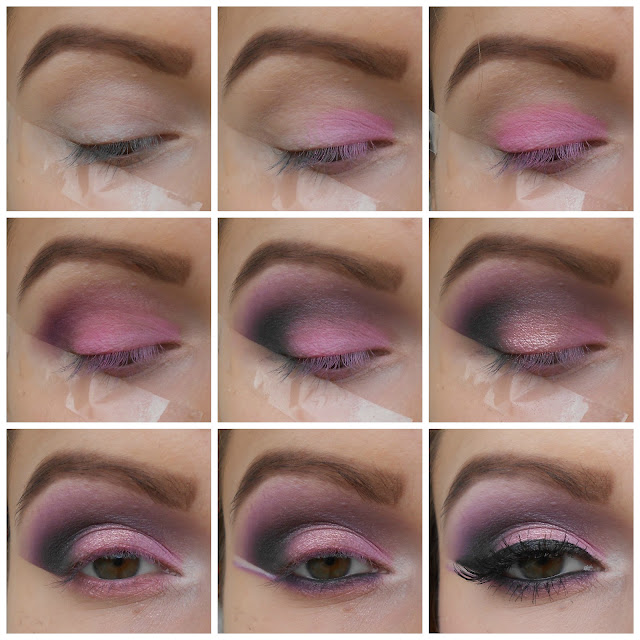
To get a straighter line I taped a tapefrom outer corner of my eye till my brow. I started with priming my lid with eyeshadow base to prevent creasing, as usual (photo 1), and then I applied a white jumbo pencil all over the lid (photo 2). I set it with white eyeshadow. Always, even when I use a white pencil to increase the intensity of coloured eyeshadows, I use an eyeshadow primer underneath. I noticed that the jumbo pencil never creases in this case. Then I applied a yellow eyeshadow on the lid, but I didn’t go all the way to inner corner (photo 3). Next I applied a brown shade in crease and blended it up on brow bone. I suggest starting with a light touch of colour and then layering it, because it's easier to blend it together with yellow that way and also to achieve soft edges. In inner corner I added a bit of white eyeshadow (photo 4). When the tape was still on my skin I outlined the flick, then removed the tape and finished the application of eyeliner (photo 5). On lower lash line and on water line I applied a blue eye pencil(photo 6) and then prolonged the line following the flick (photo 7). I softened the line with a blue eyeshadow. I also prolonged the eyeliner in inner corner and made a short flick there (photo 8). For the end I curled my lashes and applied mascara (photo 9).

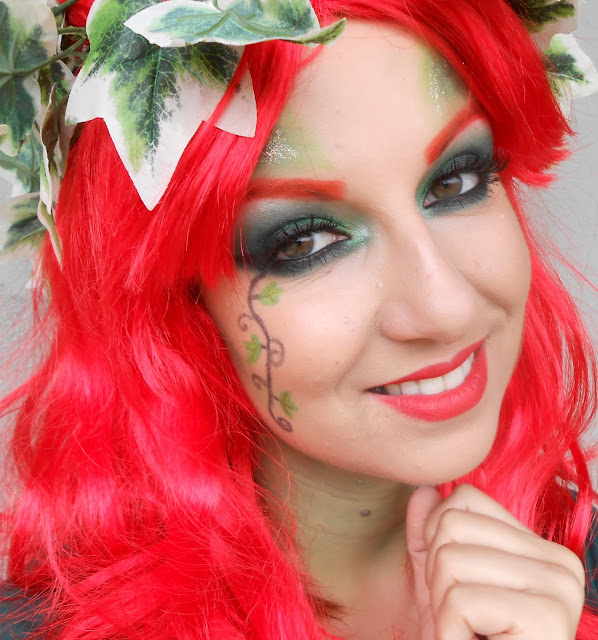
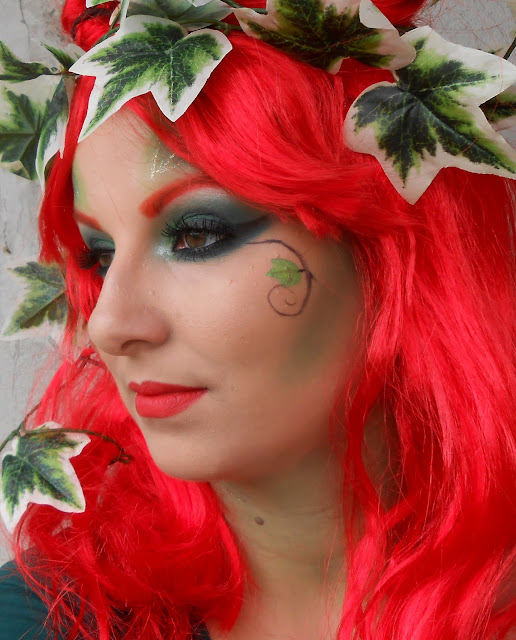
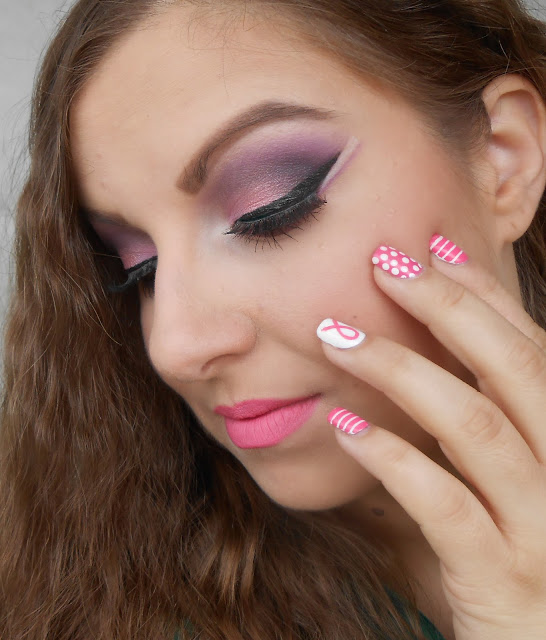
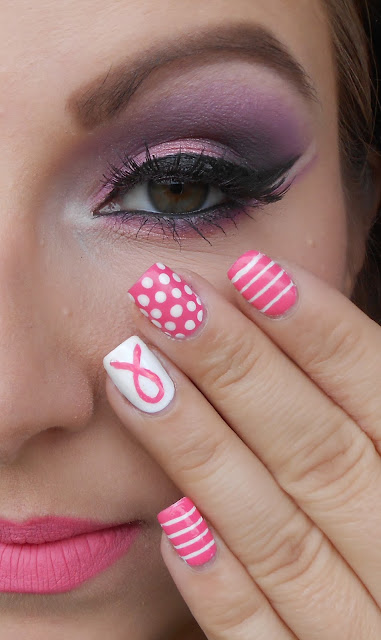
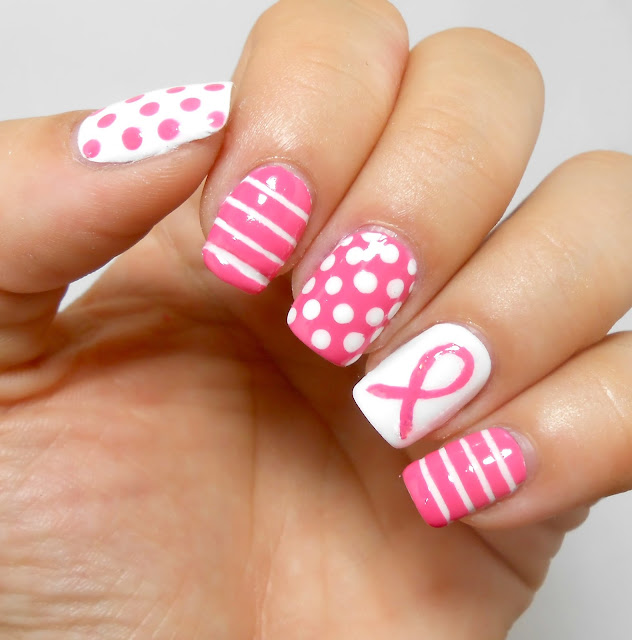
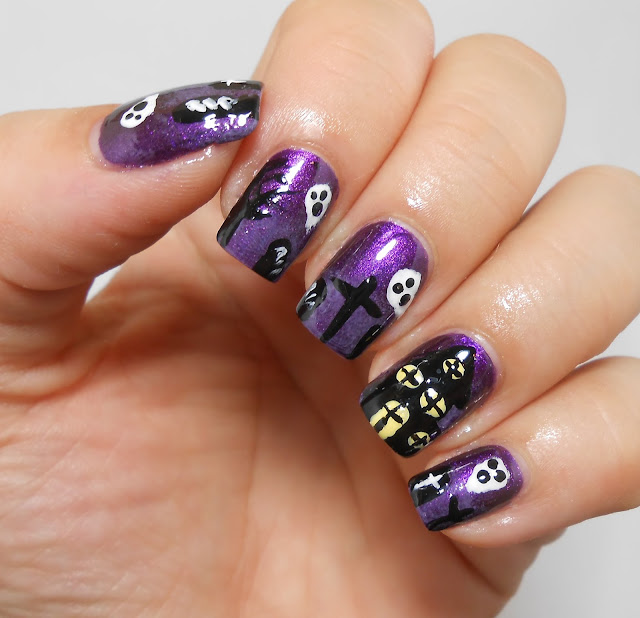
For 31 day nail art challenge a made a manicure, inspired by Minions and it was a perfect match to my makeup. Also, I can't believe, how amazing my skin looks on these photos, like it would be photoshopped (but it's not).

Products I used:
*Face
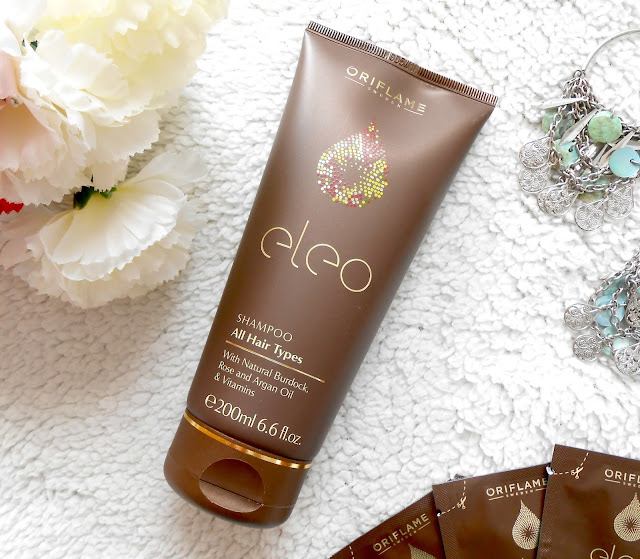
- Vichy Teint Ideal 15
- Oriflame The One Illuskin foundation Porcelain
- Bourjois Silk Finish Porcelain
- Maybelline Instant Anti-Age Rewind Fair
- Catrice Liquid Camouflage concealer Porcellain
- Catrice Prime and Fine contour palette Ashy Radiance
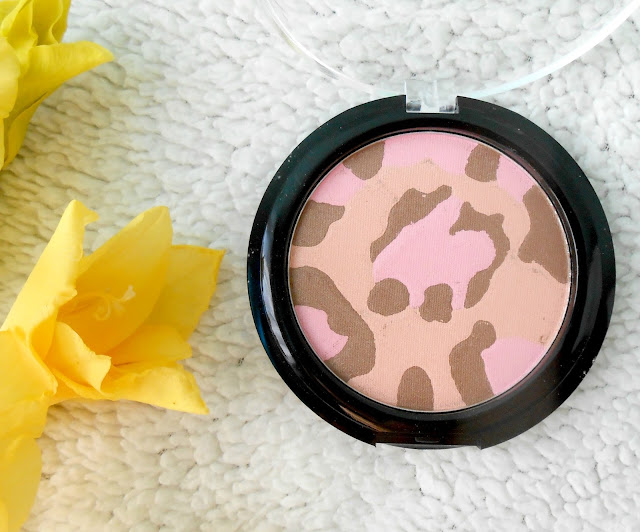
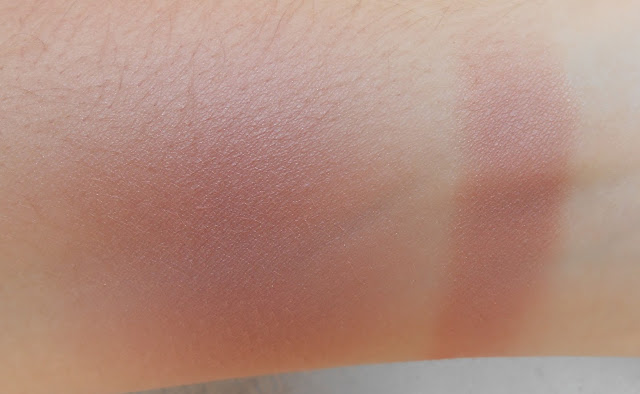
- Catrice Coral Me Maybe
- Catrice Highlighting Powder Stardust
*Eyes
- NYX High Definition eyeshadow primer
- NYX Milk
- Lady Queen 20 Colour Professional palette
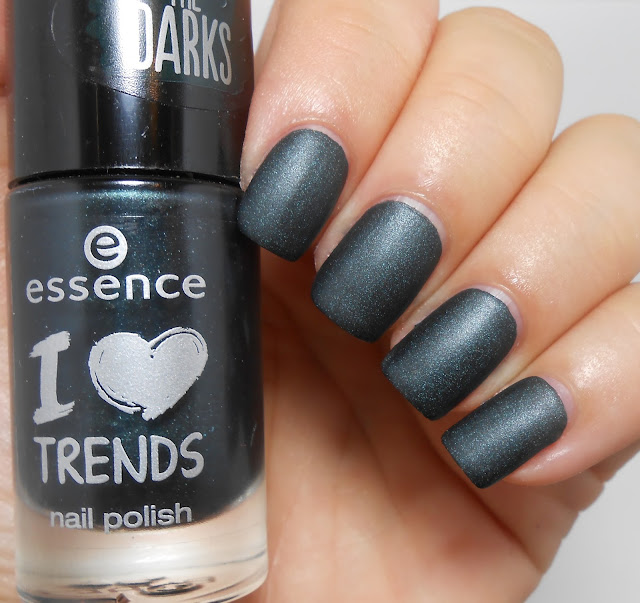
- Essence Nauti Girl Cool Breeze
- Essence Liquid eyeliner High Shine
- Misslyn eyepencil Cornflower
- Oriflame The One Stylo Black
- Essence Lash Mania mascara
- Essence How to Make Brows Wow (Love Brunettes)
*Lips
- Aura lipliner 36
- Bourjois Nude-ist


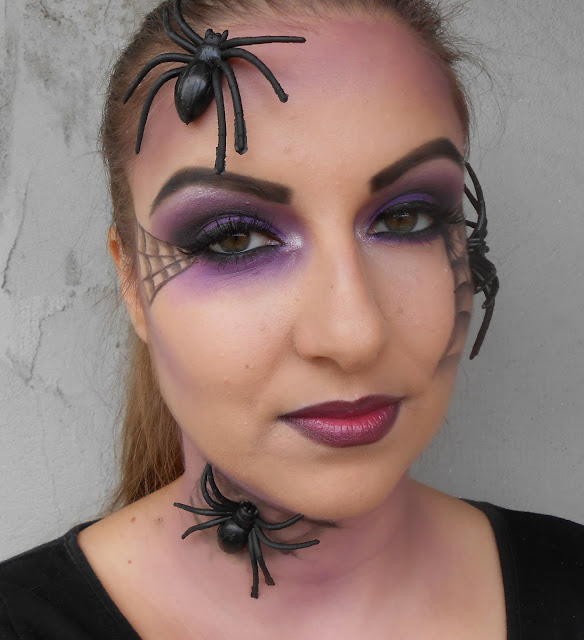
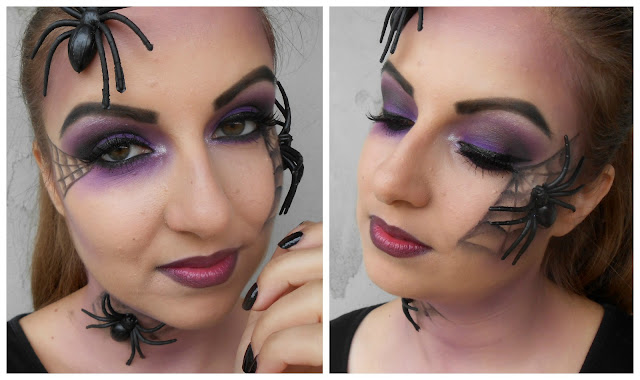
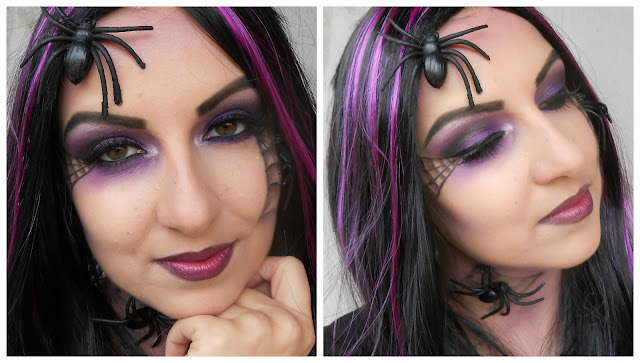
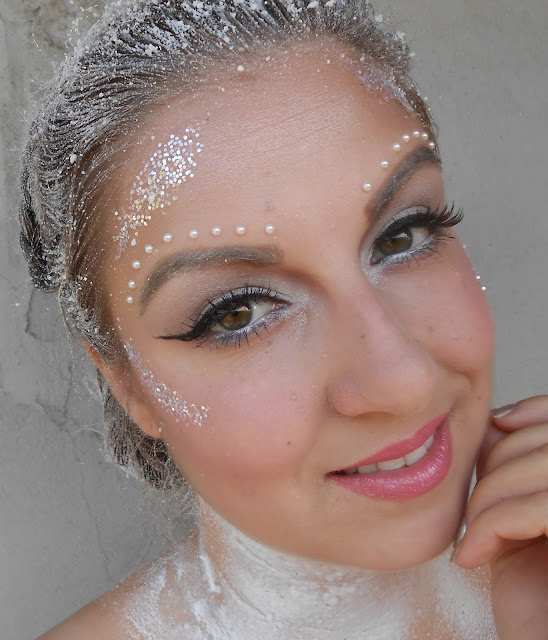
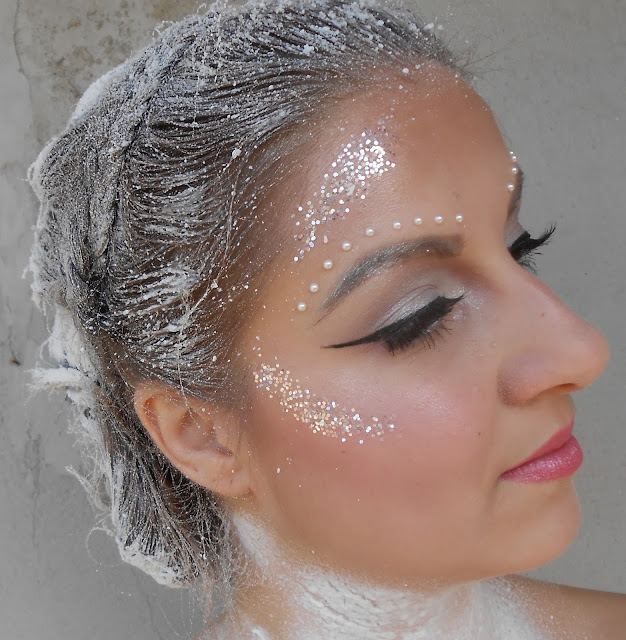
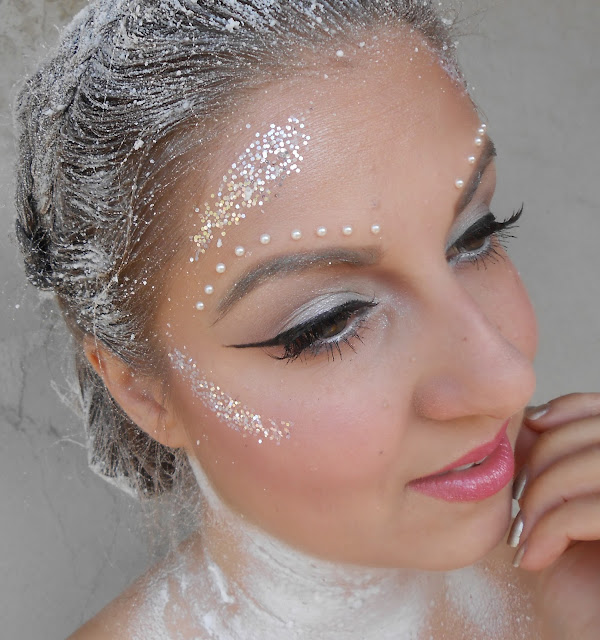
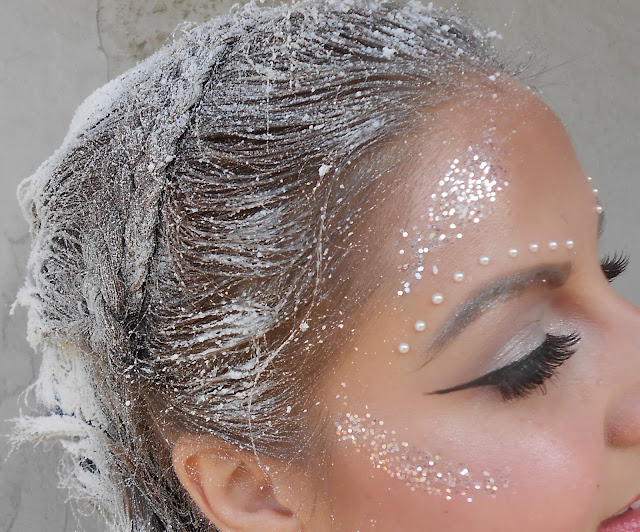
What do you think about this look? Thank you for reading!