Quantcast
Channel: Taya's Blog
Viewing all 399 articles
Browse latest View live

NOTD: Cute Owl

$
0
0
I’ve joined the “owl hype” pretty late. You all probably know this hype – they were on jewellery, clothes, bags etc. Everyone had at least one thing with an owl. Well, I always adored them on nails (I even did a tutorial a year and a half ago). I think owls are very cute animals, not to mention that every year they nest on the larch on our backyard.
When I was choosing products I wanted to review from Born Pretty Store, plate Qgirl-036quickly stole my heart. It’s a plate that has many different owl designs. I went with a simple, golden-nude manicure. As a base for stamping I used OPI Did You ‘Ear About Van Gogh and for stamping I used Essence Black is Back. On my pinkie and thumb nail I applied P2 Precious that is one of my all time favourite nail polishes. Designs were easy to transfer on nails, because they are very well engraved. My favourite design is the owl in the middle, but my nails were too small to transfer it whole, so I used the one on her left. Maybe that’s the only problem with this plate – designs are big and if you have smaller nails you won’t get them whole on your nails. 


If you’re going to shop at Born Pretty Store don’t forget to use my code DFL91. You can get Qgirl-036 plate for $2.99.

Source.

What do you think about my manicure? Thank you for reading!

Hit the Pan or Use Up (2015 Makeup Challenge)

$
0
0
I admit I'm a hoarder. I have way too many cosmetics. I constantly buy new makeup products, but I rarely manage to finish any. Slovenian blogger I admire much, Sara from Passing Fancy, has done the project pan last year and she also finished a lot of makeup products in a half a year. Her posts were inspiration to me to do the same (especially the post How much makeup can a woman use up in a half a year? Makeup empties). At the beginning of March I chose products I want to hit pan on or end up till the end of the year and started to use them. Unfortunately March was a crazy month for me (don’t even get me started with everything that happened) and I didn’t manage to take photos and write a proper post before. But it’s never too late. I choose a lot of products, maybe a bit too much (can I even finish so many lip products?), but I’ll try to do my best. If I consider that I don’t wear makeup every day that will be an interesting challenge for me. I’ll probably inform you how my challenge is going on social media (Instagram, Facebook), but in the end of the year or better said at the beginning of next year I’ll do a special Empties/Recap post and let you know how I did it.

I set myself two categories in this challenge: products I want to hit the pan on or products I want to use up. For some I know I won’t be able to use them till the end of the year, so my goal is to hit the pan and to use them as much as possible.

Face

Use up: At the moment I’m mostly using two foundations – Yves Rocher Youthful Glow 100 Beige and Catrice Nude Illusion Nude Ivory. Both are nice, medium coverage foundation. I don’t wear foundation every day, but I think I can do a pretty good job using these two up till the end of the year. I also addedMakeup Revolution The One Foundation, because I own few foundations that are two dark and mixing them with white foundation makes them brighter and more matching for my skin tone. This foundation is very liquidy and it’s using up quite fast, so it won’t be a problem to finish it soon and that’s the reason I added it in this challenge. The one of the products I’m neglecting while doing my makeup is a primer. I got Fleur de Sante primer some time ago and I think it’s already time that I finish it. It’s a silicon based primer and it makes a nice base for foundation. 


Use up: On my list of products I want to finish are three concealers: Maybelline Anti-Age Effect in Fair which I mostly use to brighten up my under eye area, Catrice Velvet Finish Velvet Ivory and Essence Stay All Day 16 h Longlasting Natural Beige concealer, which I use to cover my under eye area and to define my brows. All three concealers are already half empty.

Hit the pan: My favourite powder at the moment is Artistry Exact Fit Bisque. It’s a mattifying powder with good coverage and yellow undertone. There’s 12 g in the packaging and I doubt I can finish this powder in few months, but my plan is to hit the pan. 


Use up: Essence Ballerina Backstage Prima Ballerina is an old blush that’s half used already. It has a bit strange formula, since it’s not the easiest to blend, but it’s creamy and it’s perfect shade for summer.

Hit the pan: I haven’t hit the pan on any of my blushes yet. I guess I have them way to many. Peach and coral blushes are my favourite lately, so I chose Catrice CoralMe Maybe and Essence Sweet as a Peach to hit pan on. I use Catrice on a daily basis now and Essence I’ll use more on hotter days in summer, since this is a cream blush and I prefer cream blushes for summer. Both are very lovely shades, although Essence isn’t the most longlasting.
I use Sleek bronzer from Face Form kit for almost a year now and I have a feeling I haven’t use it any. My goal is to hit the pan on it this year. It’s a very nicely pigmented bronzer that’s easy to blend and I really love how it looks on me. I choose only one highlighter and that’sP2 High Beam. It’s one of most natural looking highlighters so it’ll look good with any of the blushes I’ll use. 

Eyes

Hit the pan: Catrice Absolute Matt palette is the palette I like to use on a daily basis lately, so I decided to include it in this post. I reviewed it recently, so read more about it here. If I’ll hit the pan on four from six eyeshadows I’ll be a happy hippo.

Use up: I adore eyeliners, but they tend to get dry quickly, so I decided to finish all eyeliners I own now before buying a new one. Alverde gel eyeliner Extreme Black is one of my favourite lately. It has more liquid formula than Essence or Catrice gel eyeliners, but it’s easy to apply and it lasts all day. From Essence Liquid Ink eyeliners I own both, a matte and a glossy version. These eyeliners have nice thin brush, are very nicely pigmented, but formula of Essence eyeliners can get thick and hard to apply quickly, so I want to use them up as soon as possible. The last eyeliner is a black eyeliner from Eye Care Black that isn’t as pigmented as Essence ones, but it’s also easy to apply due to its thin brush.
The product I also included here is Essence Big Bright Eyes. I kind of doubt I’ll use it up completely, but I want to encourage myself to use it as much as possible. I really like this pen, because it’s great pigmented, easy to apply on waterline and it makes my small eyes look bigger. 

Eyebrows

Hit the pan: Shade Love Brunettes from Essence How to Make Brows Wow palette has become my favourite quite quickly and although I use it constantly I still haven’t hit the pan. Well, my plan is to hit the pan and use it as much as possible till the end of the year. I don’t use that much other shades, although I think they would be great to use on eyes as well, since all three shades are matte nude shades and would be perfect for daily looks. 

Lips

Use up: I went big by lip products. Lip products are products I love buying, but those I rarely use are lipglosses. I want to finish them as much as possible: CatriceLip Smoother Cake Pop, Catrice My Cherry Berry and Cherry-ty lip balms from Pure Shine collection, Catrice Peach Boy lipgloss, Clarins lip perfector Rose Shimmer, Deborah Milano 08 lipgloss. The good think by lipglosses is also that when I feel I have dry lips I use a lipgloss instead of a lip balm and it also moisturizes my lips. And if I’m at home and I don’t wear makeup I don’t look so strange with coloured lips. :P  From lipsticks I choose few of older products I need to use up: Essence All About Cupcake (coral shade), Essence Urban Messages It Peace (peachy shade) and Alverde Nude. Alverde is actually one of my favourite lipsticks of all times. I also added Makeup Revolution Love a Hug, a moisturizing lipstick.


I went big with this challenge. I’m afraid I maybe went too big. But Sara finished even more products, so I’m hoping for the best. I’ll let you know the results of this challenge after 10 months. Now I’m also planning to do something similar with nail polishes. Maybe to choose 15 or 20 nail polishes that I need to use up this year. This actually shouldn’t be as hard as with makeup, because I often change my manicure (daily, every second day) and I often wear nail art or do stamping and there I use more nail polish than for a normal manicure. 

Let me know, have you done the same challenge already? Thank you for reading!

FOTD: Creating with Sleek

$
0
0
Two of my favourite palettes from Sleek are Acid and Curacao. Why? Because they contain colorful eyeshadows and they allow me to create crazy and bold looks. It's been a long time since I last created something crazy, so I decided to play with two of my favourite colors, turquoise from Curacao palette and yellow neon from Acid palette, and in the end I created the look you see on photos. 


With the exception of eyes I was mostly using products that I chose for my 2015 makeup challenge. My creativity inspires me to use makeup products I want to use up or hit the pan on, otherwise I'm not even sure I'd wear makeup so often. 

Have you noticed, how photos always expose those little mistakes you do but you don't notice in person? I only see now, how crazy bold my eyebrows are and that my eyeliner line looks drunk. Anyway, I love this look, although always when I do something like that I listen at home what the hell is wrong with me and why am I again that colorful? Family, you don't understand the power of makeup. Makeup equals happiness. 


Products I used:
*Face
- Fleur de Sante makeup primer
- Makeup Revolution The One 01 foundation
- Catrice Nude Illusion Nude Ivory foundation
- Artistry Exact Fit Bisque
- Catrice Velvet Finish Velvet Ivory concealer
- Maybelline Anti-Age Effect Fair concealer
- Sleek Face Form kit (bronzer)
- Catrice Mandy-rine

*Eyes
- NYX High Definition eyeshadow base
- NYX Milk
- Sleek Curacao palette (Martini, Blue Hawaiian, Espresso Martini)
- Sleek Acid (neon yellow, dark blue)
- Essence Liquid Ink High Shine eyeliner
- Essence Lash Princess mascara
- Toyoko longlasting eyeliner 508
- Born Pretty Store false lashes
- Essence How to Make Brows Wow (Love Brunettes for brows)

*Lips
- Catrice Beautifying lip smoother Apricot Cream


Tell me, what do you think about my yellow and blue makeup? Thank you for reading!

Spring Nail Polish Choices

$
0
0
Spring has officially started and that usually means that girls start wearing brighter shades on nails. Well, I personally wear brighter shades all the time, but today I want to share with you my five favourite nail polishes that are perfect for sunny and warm spring days. I chose the same polishes as for spring tag that was going on on Instagram some time ago. The decision wasn’t even that hard, I have to say, probably because lately I was buying a lot of darker shades and I kind of stop wearing those and went over to brighter shades. 


Deborah Milano 10 Coral Flash

Coral is not one of my favourite shades only by blushes but also by nail polishes. Deborah Milano Gel Effect nail polishes have such a friendly formula to apply, not to mention the wide brush, and they leave a glossy finish. 10 is opaque in two coats. It dries a bit darker on nails than in the bottle, but it’s such a lovely shade.  

Models Own Chrome Cherise

Pink is not my shade, not at all, but the chrome effect makes Cherise completely unique and beautiful. I’m wearing it constantly on my nails, because it dries quickly and I don’t need a top coat. I usually apply two coats. This probably isn’t the most spring shade, but I really love to wear it.

Spring nail polish color sheme isn’t complete without a blue shade. I chose Crazy Beauty, which is a bright blue cream shade with an amazing formula that goes on nails smoothly and it’s opaque in two coats. 

Although its formula is not the nicest, (S)wimbledon is an amazing and noticeable shade. I always get compliments when I’m wearing this polish. It’s opaque in two coats and the new Catrice brush is also a good addition to this love in the bottle. 

This is the prettiest mint green nail polish with a nice pigmented formula. It’s opaque in two coats. I can’t wait to get more tanned skin because this polish will look amazing with it. This one was a part of LE collection, but in some DM’s you can still find it. 


Deborah Milano 10 Coral Flash

Models Own Chrome Cherise

P2 Crazy Beauty

Catrice (S)wimbledon

Essence Always on my Mint

Which are your favourite shades for spring? Thank you for reading!

Review and Swatches: Essence Longlasting Lipliners

$
0
0
I adore products for lips. What I adore even more is trying new products for lips and telling you, my readers, what I think about them. Today I’m going to share with you my opinion about new Essence Longlasting Lipliners. Essence is constantly improving the quality of their lip products. If I just mention their longlasting lipsticks, few of the shades are true gems. I love their old lipliners a lot as well, because creamy and soft products are my thing, but these new lipliners are even better. I got four shades and I’m seriously thinking about purchasing other five shades as well. 


There are 9 shades of longlasting lipliners and I own four: Yummy Berry, Lovely Frappuccino, A Girl’s Dream and Plum Cake. I like the packaging, which is in a color of each shade and it's very sturdy. Longlasting lipliners have a twist up system, so you don’t need to sharpen them, which I personally like a lot, but there’s one catch. I do not support if someone opens a product in the store, but by lipliners and other pencils I suggest you to do that. First thing is that some girls often swatch a product that’s for sale and it can happen that you’ll buy a product that’s already been used (been there, done that, never again). The other thing is that some liners are badly made and their point falls out. I know Sara has mentioned she found few samples like that in the store and also I managed to buy one that falls out from the packaging every time I try to use it. 


The formula of longlasting lipliners is amazing. It’s creamy and soft, but then again not so soft that it would go over the line of your lips. It’s very pleasant to be worn on lips and it doesn’t dry them out, which is an important characteristic for me who tends to have dry lips often. Because lipliners have thin tip they’re easy to apply and their pigmentation is amazing. They cover the surface with one swipe. Unfortunately they aren’t that longlasting on my lips. If I wear them alone they wear off in two to three hours, considering I drink a lot during this time. They do transfer on a glass or a cup. They look matte on lips and they fade from lips evenly. Their formula does emphasize dry parts on lips, so I suggest you to use a peeling and a lip balm before application if you have problems like that.  

Interesting information: Although on my lips they don’t last that long, they stained my skin when I swatch them. I couldn’t remove the stain even with micellar water, so I used soap and then it went off. 

I often wear them in a combination with Bourjois Velvet Rouge matte lipsticks. Now, my darlings, this is a winning combination. Together they last hours and hours despite drinking and eating. After some time the combination fades away a bit and my lips start to feel dry, so I just re-apply Bourjois lipstick then. Combinations I like to wear are Yummy Berry + Pink Pong, Lovely Frappucino or Plum Cake + Nude-ist and A Girl’s Dream + Frambourjoise (sometimes I also try other combinations). 


Yummy Berry
On one side this is the prettiest shade, but on other the most disappointing. I adore pink shades on lips, as you know, and this one is perfect for spring and summer days when we switch darker shades for brighter. Well, the problem by this one is that I expected it’ll be as dark as in the packaging, but it actually looks brighter on my lips. Don’t get me wrong, I do like the shade anyway, but the same shade as the packaging is would convince me even more. The other thing is that its pointer falls out. That makes the application very hard, because I’m trying to keep the pointer in the packaging while I’m applying this product.

Lovely Frappuccino
Everybody and their mother know already that this shade is a dupe for Mac’s Soar. It’s always great when you find a dupe for expensive cosmetics I guess. This is a gorgeous brownish nude shade that’s amazingly pigmented which makes it a noticeable nude. Well, despite being nude I don’t really like to combine it with bolder eyes, but rather more neutral looks.  

A Girl’s Dream
A Girl’s Dream is an interesting shade, it’s like a muted pinkish red shade. Well, on me it looks red. On one hand I don’t mind that it looks red on me because I like red shades, but on other I wish it would look more like in the packaging, because it’s really a special shade.

Plum Cake
Plum Cake is not really a “me”, but surprisingly it’s my favourite of all four shades. This is also a nude shade, just that it has a purple undertone. I love how it looks on me. It suits me much better than Lovely Frappuccino. I think any of these two shades is a perfect choice if you like Kylie Jenner lip style, which is very popular lately, because almost every Youtuber and many blogger have done tutorials for her look. 


Essence Yummy Berry

Essence Lovely Frappuccino

Essence A Girl's Dream

Essence Plum Cake

Essence lipliners contain 0,23 g and they cost 1,49 €. They are available at Müller stores. I personally like them better than Catrice longlasting lipliners, because they aren’t as fragile and drying on the lips. They are also cheaper, if we compare the weight. 0,23 g of a product isn’t much, but enough for me, since I never really manage to end up a lipliner or a lipstick (lip balms are exception). 

Have you tried Essence longlasting lipliners? How do you like them? Thank you for reading!

Review and Swatches: Models Own Colour Chrome Cerise and Silver

$
0
0
Today I’m going to talk about two nail polishes that won’t be everyone’s cup of tea. I’m talking about Models Own Chrome Cerise and Chrome Silver nail polishes from Colour Chrome collection. They have a special finish that most of people don’t like, but I adore. Why? Because they stamp really well. These polishes are supposed to be worn without base/top coat. 


Models Own ColourChrome collection contains 10 nail polish shades, 7 of them are available in Slovenian online store Click2Chic. Round bottles are in the colour of each shade and they have that smooth mirror effect. One polish contains 11 ml and on Click2Chic it costs 5,95 €

Colour Chrome collection has wide, flat brush that is easy to work with. The formulaof both polishes is also nice, not too thick, but still, carefulness by application is needed. Because these polishes have a chrome finish, brush strokes can be visible, but that all depends from the thickness of coats and other factors. You know when I had biggest problems with application? When I was swatching them for this post. It was my mistake, because I didn’t wait long enough for a base coat to dry. Yes, always when I’m swatching I use a base coat, it kind of become a habit for me. When you use polishes with that kind of finish I suggest you to wait at least fifteen to twenty minutes for base coat to be completely dry (if you’ll use a base coat as I did), otherwise nail polish won’t apply evenly (I applied it three minutes after the application of base coat and came across this problem). Of course, chrome nail polishes can be worn without base coat and Models Own suggests you to do so. In that case I recommend you to clean the surface of your nails very well, because this finish canemphasize every imperfection. If you have any ridges on your nails, those will be visible, too. And don’t worry, these polishes won’t stain your nails. The usage of top coat is also not necessary, because chrome effect already looks amazing on its own. When polishes dry brush strokes are not that visible anymore, but I did notice that without a top coat they chip very fast, like in a day.


Chrome Cerise is a fuchsia pink shade and it’s one of my favourite polishes to wear lately. I used two coats for this swatch. The drying time is really short, even if you apply thicker coats. 


Chrome Silver is, as the name suggest, the silver chrome nail polish. I also used two coats for this one. Both polishes could cover the nail surface in one coat because they have great pigmentation, but because of brush strokes and more even application two are better.  


As I already mentioned before, these are great for stamping. I used Essence Black is Back as a base and Born Pretty Store BP29 stamping plate together with both Models Own polishes. 


I would suggest polishes from Colour Chrome collection to all who like this finish and to everyone who searches for a good stamping nail polish. At the moment I'm having shades Chrome Blue and Chrome Rose on my wish list and for shade Chrome Gold I'm still not sure if it's unique enough to end up in my collection.

How do you like polishes from Colour Chrome collection? Thank you for reading!

Ocena v slovenščini.
Danes vam na blogu predstavljam dva laka, ki pa žal ne bosta povšeči vsem. Govorim o Models Own lakih Chrome Cerise in Chrome Silver iz najnovejše kolekcije Colour Chrome. Zanju je značilen poseben chrome finiš, ki vsem ne bo všeč, jaz pa ga obožujem. Poleg tega, da, vsaj meni, lepo izgleda na nohtih, so laki s tem finišem popolni za štempljanje.
Colour Chrome kolekcija vsebuje 10 odtenkov, pri nas pa jih lahko v spletni trgovini Click2Chic dobite 7. Njihova značilnost je, da so v svetleči okrogli steklenički v barvi posameznega odtenka, posamezna steklenička pa vsebuje 11 ml laka. Pri nas je cena enega laka 5,95 €.
Čopič v tej kolekciji ješirok in ploščat ter omogoča lahek nanos. Laka nimata pregoste ali preredke formule, vendar pa potrebna določena pazljivost je pri nanosu, saj so po navadi pri lakih s chrome izgledom na nohtih vidne sledi čopiča. Seveda je to odvisno tudi od nanosa, debeline posameznega sloja ipd. Dejansko nikoli nisem imela problemov z nanosom obeh lakov, razen takrat, ko sem ju swatchala za ta post. Kot da bi se bogovi lepotnega sveta zarotili proti meni, lol. Models Own priporoča, da na nohte nanesete 2 ali 3 sloje posameznega laka iz kolekcije Colour Chrome brez podlaka ali nadlaka. Sama sem sicer navajena na obvezno uporabo podlaka pod katerimkoli lakom, tako da sem ga uporabljala tudi tule. Če ga boste uporabljale tudi ve, priporočam, da počakate, da se podlak zelo dobro posuši. Sama sem nanesla lak na nohte tri minute po nanosu podlaka, posledica česar so bile težave z neenakomernim nanosom, ker podlak ni bil dovolj dobro posušen. Če ne boste uporabljale podlaka, priporočam, da nohtno površino pred nanosom dobro očistite z acetonom, ki bo odstranil vso umazanijo in maščobo z nohta. Zavedati pa se morate, da laki  s chrome finišem poudarjajo vsako nepravilnost na nohtu, tako da če njegova površina ni ravna oz. imate kaj na nohtu, bo to zelo vidno. Ti laki pa seveda ne obarvajo vaših nohtov. Tudi uporaba nadlaka ni obvezna, ker chrome finiš izgleda sijoče in krasno že sam po sebi, vendar pa nadlakskrije nepravilnosti in tudi podaljša obstojnost laka. Pri meni sta oba odtenka, če sem ju nosila brez nadlaka nadlaka, okrušila v roku enega dne.  
Chrome Cerise je roza odtenek s chrome finišem, meni pa je posebej pri srcu, ker ne gre za tipičen Barbi pink odtenek, ampak ima malce rdečega podtona v sebi. Nanesla sem ga v dveh tankih slojih. Lak je sicer prekriven že po enem debelejšem sloju, vendar pa zaradi bolj enakomernega nanosa in manj vidnih sledi čopiča priporočam dva tanka. Chrome Silver pa je, kot že ime pove, srebrn chrome odtenek. Tudi za tega sem uporabila dva tanka sloja. Oba laka se zelo hitro posušita, ne glede na to, ali uporabim tanjše ali debelejše sloje. Ker sta super pigmentirana, sta odlična za štempljanje. Za vas sem pripravila tudi manikiro, s katero se lahko prepričate o mojih besedah. Kot podlago za njo sem uporabila črn Essence lak Black in Back, motivi pa so z Born Pretty Store BP26 plošče.
Lake iz Colour Chrome kolekcije priporočam vsem, ki vam je ta izgled všeč in vsem, ki iščete dobre lake za štempljanje. Mene trenutno mikata še Chrome Blue in Chrome Rose odtenka, za Chrome Gold pa še nisem prepričana, če bo pristal v košarici ali ne.
Kako sta vam všeč ta dva Models Own odtenka? Hvala za pozornost!
*I got these products for review purposes./Ta dva laka sem prejela v oceno.

FOTD: Red on Eyes

$
0
0
I often admired bloggers who wore red eyeshadow on eyes. I tried to do a makeup with red eyeshadow few times before, but never succeeded. It always looked like someone would punch me in the face. But not this time. This time I made a look I love from the bottom of my heart. And because I'm proud on it, you know I have to share it with you, too. :)


I primed my eye with NYX HD primer, which I really love. Because white base always makes bright eyeshadow looking more intense I used NYX Milk jumbo pencil all over the lid and blended it out. In inner corner of my eye I first applied neon orange shade from Sleek Acidpalette. Then I used red shade Bloody Mary from Sleek Curacao palette in the middle of eyelid and in outer V raspberry shade from Acid palette. Espresso Martini, a matte black shade from Curacao palette, is one of the best pigmented and blackest black eyeshadows in my collection. I used it in crease and blended it out toward brow bone. For more clean and straight line in outer V I placed tape on my skin before applying makeup and before I went on lower lash line I removed it. Under my eyes I used Espresso Martini as well. In inner part of my eye I draw line more down and in outer part I pulled it far outside, parallel with black eyeshadow on upper lid. The space between orange and black eyeshadow in inner corner I filled up with Martini from Curacao palette, which I also used for highlighting my brow bone. The place between black eyeshadow in outer corner of the eye I filled up with NYX Milk pencil. On waterline I applied Essence Big Bright Eyes highlighter pen. This look of course required eyeliner and false lashes. For eyeliner I used Essence Liquid Ink Matt eyeliner, because most of the look is matte, and false lashes are from Born Pretty Store

On cheeks I wanted only a bit of gentle colour, so I used my favourite peachy blush Catrice Mandy-rine. On lips I used a combination of Essence lipliner (A Girl's Dream) and Bourjois lipstick (Nude-ist), which is one of my favourites, because it lasts for hours on my lips. 


Products I used:
*Face
- Fleur de Sante makeup primer
- Makeup Revolution The One 01 foundation
- Catrice Nude Illusion Nude Ivory foundation
- Artistry Exact Fit Bisque
- Catrice Velvet Finish Velvet Ivory concealer
- Maybelline Anti-Age Effect Fair concealer
- Sleek Face Form kit (bronzer)
- Catrice Mandy-rine
- P2 Glow Up highlighter High Beam

*Eyes
- NYX High Definition eyeshadow base
- NYX Milk
- Sleek Curacao palette (Martini, Bloody Mary, Espresso Martini)
- Sleek Acid (neon orange, raspberry)
- Essence Liquid Ink Matt eyeliner
- Essence Lash Princess mascara
- Essence Big Bright Eyes Highlight it ... Nude
- Born Pretty Store false lashes
- Essence How to Make Brows Wow (Love Brunettes for brows)

*Lips
- Essence A Girl's Dream lipliner
- Bourjois Nude-ist


How do you like this look? Thank you for reading!

Review and Swatches: Essence The Gel Nail Polish (+ Comparisons)

$
0
0
Very popular trend among beauty brands is releasing nail polishes with gel formula. These are not the polishes, for which you would need an UV light, but their characteristic is that they dry into a very glossy finish. This year Essencereleased 46 new(and old) nail polish shades with gel alike formula in The Gel nail polish collection, for which you don’t need any light. I personally adore polishes with this formula, because they are usually much pigmented, easy to apply and they look shiny on nails. When I visited DM the other day, most of the polishes were already sold out (I guess I wasn’t the only one excited because of these polishes), but I did find few shades that I liked. Eight of them, to be exact. Lately I wasn’t buying much of Color&Go nail polishes, so I don’t have any old similar shade to my 8 new shades, but they did keep the colour and change the name or keep the colour and the name by some of the polishes (check out this Katja’s review). 


Although the brush of new The Gel nail polishes looks practically the same as old one, I’d dare to say that they changed it. It must be cut better, because application is easier with it. The formula of these new polishes is amazing. Most of them are very good pigmented and opaque in two coats. All polishes apply like a dream. By none of these 8 shades I didn’t have any problem with application, not because of a formula and not because of the brush. All polishes look very shiny when they dry, even the shimmery ones. I can’t say how long they look glossy, because I always use a top coat with my manicures (except for the swatches). I also can’t say anything about the duration time, meaning how long they will last on your nails. I personally have very weak nails and none of the polishes (no matter how good it is) lasts longer on my nails than 2 days. When I was testing these polishes I had a lot of dishes and cleaning to do and water is never kind to a nail polish, so these chipped quickly. The drying time depends from each polish and from the thickness of coats. 


Love is in the Air is a pastel yellow creme shade. This polish is amazing. Its formula is much pigmented and it covers nails in two thicker coats. The application looks very even and not streaky at all. If you like to use thinner coats you’ll probably need 3 coats.


Don’t Be Shy is a lime green creme shade that’s also opaque in two coats


Play with My Mint is a gorgeous mint creme shade with great formula that covers nails in two coats. No matter how many mint shades I have in my collection I always allow myself to buy another one. And although I currently probably have around 15 mint shades in my collection, this one is quite unique as you’re going to see lower in this post. 


Prince Charming is a turquoise shade that contains tiny green shimmer. I used two coats for this swatch. Is anyone else bothered by the fact that Essence constantly uses the same name for different nail polish shades? Few days before I bought these polishes I bought a lilac satin nail polish from Cinderella collection with the same name. Gosh, Essence should really know better. 


Wonderfuelis a purple shimmery shade with sheer formula, so at least 3 coats are needed for it to be opaque on nails. This polish is very interesting; on nails it looks like it is slightly duochrome, which is probably because of the blue shimmer in it. 


Electriiiiiicis my favourite shade from all 8. It’s a royal blue jelly shade. It has nice formula that could be opaque in two coats, but I had to use three for this swatch, because after two nail line was still noticeable on photos, although not that much in person. 


True Loveis a berry red creme shade with nicely pigmented formula and it’s opaque in two coats. I thought I’d find dupes for this one in my stash, but it’s pretty unique, because most of the shades I have are either more berry or more red.


Do You Speak Love? is a dark red cream shade, also nicely pigmented and opaque in two coats. I don’t know why I don’t wear dark red shade more often, because it’s really pretty. 


Essence The Gel nail polishes are available at DM, Müller, Tuš drugstore and Click2Chic. There are 46 shades. One polish contains 8 ml and the price is 1,69 €. I personally love the new formula and also brush seems better to me, so I’m definitely going to get few more shades. 

Comparisons
As a person who adores nail polishes I often buy shades that I maybe already have in my stash. Because Essence shades seemed familiar to me I went through my stash and picked up few nail polishes that could be dupes/similar to new The Gel nail polishes. As I said before, I didn’t buy much Color&Go nail polishes lately and those that I have in my stash aren’t similar to these new polishes, so I can’t compare them for you. 

Yellow comparison

Yellow is the shade I do like and yes, I have many yellow nail polishes. I was a bit afraid that I might already have a dupe for Love is in the Air, but in the end the closest shades were Claire’s pastel yellow, which is paler, Catrice Bye, Bye Birdy!, which is darker, and Essence My Yellow Fellow, which is similar shade, but it contains shimmer. I have only quarter of this polish left so I plan to use it up this year. 


Lime green comparison

Lime green is such a pretty shade to me, although not everyone loves it. I always hesitate before buying a lime green polish because they all look the same to me. Well, when I compare them one near the other, they don’t look so same anymore. I compared Don’t Be Shy with Catrice Easy Peasy, Lemon Squeesy, which has more yellow undertone, Catrice ACid/DC, which is darker, and Essence Colourbration, which is a shimmery shade. No dupes here. 


Mint comparison

I adore mint colour, what can I say. Two years ago I made a mint nail polish collection post, which you can read here. Since then I got few more mint shades and Play with my Mint is one of them. I didn’t want to post all of my mint polishes again, so I searched for those that looked the closest to new Essence polish and found three shades: H&M Bella’s Choice, China Glaze Aquadelic and Beauty UK mint. Although they are close, none of them is the exact dupe, because Play with my Mint is the brightest of them all. 


Turquoise comparison

Prince Charming is quite unique shade in my stash. In the bottle it looked the closest to Catrice (S)wimbledon, but on a nail wheel they look completely different. The closest shade to Prince Charming is Essence Mojito Green, which is an old polish from Soul Sista trend edition, but it’s darker than Prince Charming. 


Purple comparison

I had to compare Wonderfuel with duochrome shade and the only purple duochrome shade in my stash is Essence Power Girl from Superheores trend edition. Comparison side by side on a nail wheel shows how different they are and that Wonderfuel has only slightly duochrome effect because of a blue shimmer. 


Royal/navy blue comparison

Royal/navy blue is one of my all time favourite shades. I don’t have so many polishes in this colour as I do have in mint, but the collection isn’t small either. Usually these polishes look almost the same in the bottle and on nails you can actually see, how much they differ. Bourjois In the Navy looks very similar to Essence Electriiiiiic on a nail wheel, the difference between them is in finish. Essence has a jelly finish, while Bourjois has a creme one and a very opaque formula. Electriiiiiic is actually a new release of an old Essence shade Cool and the Gang. I don’t know why that isn’t visible on a nail wheel, but these are exact dupes. Both have jelly finish just that new shade has a better formula.


Berry comparison

I already said before that Essence True Love is a unique shade in my stash. I compared it to Essence Be Berry Now, Essie Bahama Mama, Essence Don’t Bite Me – Kiss Me and Essence Hot Fruit Punch. True Love has red tone to it and that makes it different from all other shades.


Dark red comparison

I don’t have many dark red nail polishes. I don’t buy them much, because I don’t wear them much. But not matter that I did find a dupe for Do You Speak Love? in an old Essence polish from Eclipse trend edition Thirsty. Maybe Thirsty is slightly darker, but they are very close. 


How do you like new Essence The Gel nail polishes? Have you tried them already? Which one is your favourite? Thank you for reading!

Review and Swatches: Makeup Revolution Big Love Palette

$
0
0
Makeup Revolution is a brand that's only one year old, but they are launching new and interesting products all the time. Their products are a hit or a miss – I own few products that I adore and some that didn’t impress me and I threw them away. Their eyeshadows palettes are the ones that often impress me with the selection of shades, although the quality wasn’t always the best, because their eyeshadows creased on me. When I received the palette Big Love I felt in love immediately. So many gorgeous shades, perfect for everyday and smoky “going out” looks.

The idea behind this palette is that it contains 3 sections of 5 eyeshadows in one palette. Sections are called Head over Heels, Last Kiss and Dreaming. Each of them enables you to create one look (that’s why they call it “1 palette 3 looks”), but you can also mix different eyeshadows and create your own looks. I’m going to show you 4 looks – one made with shades from each section and the mixed look I did with a whole palette. 


The palette has a big plastic black shiny packaging with a big mirror inside (high five for that, MR), two side applicator and it’s very well made. It’s big so I don’t find it the most appropriate for travelling, but on the other hand you get everything you need for daily and “going out” looks in one palette. It weights 13 g and it costs 8,95 € on Ličila.si (£6 of official Makeup Revolution site). Lids in the palette are different, so you don’t get the same amount of each eyeshadow. The biggest lids have highlighting shades and the smallest eyeshadows that can be used on lids or in crease. The most amazing thing, as always, is that eyeshadows have names. How cool it is to say now I’m applying Into the Night or any other fancy name on lids, huh? ;)


The quality of eyeshadows differs from shade to shade. Some are great pigmented and silky, while others are chalky or not so well pigmented. Most of eyeshadows dust and they fall out by application on lids. Otherwise they stick nicely on lids and blend easily. After few hours these eyeshadows lose the intensity, but what's more important they don't crease. If you're going read my old reviews of Makeup Revolution palettes then you'll read that their eyeshadows crease on me despite my normal lids. Well, they improved the quality, because Big Love eyeshadow do not move in lines. 


Head over Heels

This collection contains more golden-brown shades. It’s perfect for everyday wear, but it also allows dark smoky looks.
Looking Out– it’s a nice silky nude highlighter with tiny glitter, which unfortunately isn’t the best pigmented. On my swatches is barely visible, because it’s very close to my skin tone.
Chameleons– it’s a golden shimmery shade. To me this is the most disappointing shade, because it’s hard on touch and although it has an okay pigmentation, it doesn’t apply very evenly on eyes. I have to dab it on lids if I want to achieve nice and even look. But it’s the shade that suits my eye colour nicely, so I wear it mostly on lids.
Into the Light– is a light brown shimmery shade with good pigmentation and it’s my favourite in this section. I usually use it in crease, but it’s also perfect for wearing on lids and on lower lash line.
Into the Night– is a dark brown shimmery shade with amazing pigmentation. This one would be great to use on lids if I’d wear smoky look, but otherwise I like to use it in outer V or to darken out the crease.
Head Over Heels – the eyeshadow that wears the name of the collection is the darkest brown shade with an amazing pigmentation and together with Into the Night is the softest and silkiest eyeshadow in the section. This eyeshadow is perfect to use in outer V, but I also like to use it as liner.

For this look I used Chameleons all over the lid, Into the Light in crease, Into the Night in outer V and on lower lash line, Head Over Heels as liner ad Looking Out to highlight my brow bone and inner corner.

Last Kiss

The middle section contains purple toned eyeshadows and it’s perfect for those who like purple shades. I personally reach for them often, because I think purple looks good on me.
Romantic Moments – is a pink toned matte highlighting eyeshadow. Its pigmentation also isn’t the strongest if I compare it to Looking Out. When I blend it on eyes is barely visible.
First Kiss – is a purple shimmery eyeshadow with good pigmentation and it’s my favourite in this section. I love to use it on lids.
Lover – is a dark taupe shimmery shade. I like to use this one in crease when I’m wearing eyeshadows from this section on eyes.
Absorbed – is a plum shimmery shade. This one can be used anywhere – on lids, in crease, in inner corner by darker looks, on lower lash line. It’s very pretty shade.
Last Kiss – this is the darkest shade in this section. It’s a dark purple shade that contains tiny pink glitter. Its pigmentation isn’t as strong as by other eyeshadows, but it’s buildable. 

I used First Kiss all over the lid, Absorbed in crease, Lover in outer V, Last Kiss on lower lashline and Romantic Moments to highlight my brow bone. 

Dreaming

The section with the prettiest name is full of greyish eyeshadows that are appropriate for dark looks on nights out, but they also allow simple daily look. Despite the prettiest name this is my least favourite section in the palette.
Stepping Out– this is a pearly white shade and it’s the best highlighting eyeshadow in the palette. Its pigmentation is amazing and it’s perfect for inner corner of the eye to open the look.
Simply Stunning– is a brown shimmery shade with good pigmentation and this is the shade that enables a daily look with this section if it’s used on lids. I also like to use it in crease.
Weave Your Magic– is a very dark grey, almost black shimmery eyeshadow with very good pigmentation, but this one can lose the intensity quickly when it’s blended out.
Different Light– is a silver grey shimmery shade with great pigmentation. If you like silver on eyes this one is perfect to use on lids. By darker looks it can also be used in inner corner instead of highlighting shade.
Dreaming– is a black eyeshadow with multicoloured glitter. Its formula is a bit chalky and although it has a nice pigmentation, it’s my least favourite eyeshadow in the whole palette. I have to admit I haven’t used this one much. 

I used Simply Stunning in Crease, Weawe Your Magic on inner and outer third of the lid and on lower lash line, Different Light in the middle of the lid and Stepping Out to highlight my brow bone. 

Mixed look
And for the end I have a look for you that was created with different eyeshadows from all three sections. First I used Simply Stunning in crease (I have noticed that lately I always start with a shade in crease, not on lids). Then I applied Into the Light on inner third of the lid and First Kiss on other two thirds of the lid. To deepen the crease I used Head Over Heels. In outer V I lightly applied Weave Your Magic. On first third of lower lash line I applied Absorbed and on other two thirds Last Kiss. In inner corner I used Different Light. Then I blended out First Kiss on lower lash line with Head Over Heels. The place between eyeshadows on upper lid and lower lash line I filled with NYX Milk white pencil. The brow bone I highlighted with Stepping Out. If other three looks are more wearable looks to me I wanted to create something special with a whole palette and I'm really satisfied with this look. 


Overall, this palette isn’t bad at all. It has its flaws, but it’s a good drugstore palette. Eyeshadows are good pigmented and don’t crease, the packaging is sturdy and it comes with a big mirror inside. By my opinion this palette is perfect for people who are just starting with makeup. For 9 € you’ll get a palette with 15 eyeshadows that will allow you to create different looks. In Slovenia you can order it on Ličila.si and international readers can get it on Makeup Revolution’s official site.  

What do you think about Big Love palette? Have you tried it already? Thank you for reading!
*PR product

NOTD: Essie Spring 2015 Garden Variety

$
0
0
In Slovenian DM's we can already find the newest Essie collection for spring 2015. This collection has 6 shades: few nudes, one mint, teal and a purple shade. I had a coupon for 25 % discount on one product and decided to use it for Essie polish. In decision between mint Blossom Dandy and teal Garden Variety the latter won. 


Essie Garden Variety is a gorgeous vibrant teal shade with creme finish. Polish has a wide brush as all Essence polishes and its formula is amazing as well. I've never had a problem with application by creme Essie polish before and this one is no exception. It goes on nails smoothly and even, and it's opaque in two coats. Teal polishes can sometimes stain nails, but I had no problems with this one. I wore it for two days and it chipped on my right hand, on which I have the weakest nails, and then I removed it. 

I have to say my camera doesn't really like this polish. In person is definitely more green and vibrant as my camera is trying to show you. I personally adore this shade, because as you know all kinds of green color variations are me shades. :)


Essie polishes are available at DM for 9,95 €. One bottle contains 13,5 ml of a product. This collection is appropriate for everyone who likes nude and bright shades. I hope DM will soon have 1+1 offer again for us who find Essie polishes a bit pricey.

Did you get any shade from Essie spring collection? Thank you for reading!

The Blush Tag

$
0
0
I haven't done any tag for a while, so I thought I'd do one today. I'm a huge blush lover and soon I’m going to publish a post in which I'm going to show you all of my blushes, but before that I decided to do The Blush Tag.

How many blushes do you own?
Around 43, if I didn't forget to count any. And most of them are drugstore, not to mention a half of them are probably from limited edition collections.

What is your favourite blush brush?
Ecotools brush blush. It's just the best. Soft, dense, it picks up just enough of a product and it blends the blush on the cheeks amazingly. 

Cream vs. Powder?
Although I'm a fan of both finishes, I prefer powder blushes. I just find them easier to work with and they also last longer on my skin. Cream blushes are more “summer type” blushes for me.


Peach vs. Pink and favourite of each?
What about corals? Because corals are my favourite. Otherwise I prefer peach blushes. My favourite peach blush is Catrice Mandy-rine. It gives such a natural look to my cheeks, which I adore. My favourite in pink family would probably be Catrice Pinkerbell. It’s amazingly pigmented blush and I have to be careful by application, because I can quickly look like a clown if I apply it too much, but a right amount of a blush gives a nice rosy touch to the cheeks.

Drugstore vs. High End and favourite of each?
I don't think I have any high end blush, but my favourite from drugstore are Catrice Defining blushes. The colour selection is not big, but they change assortment all the time and they always release very interesting and wearable shade. The fact that most of them (if not all) are matte is even bigger plus.

Most overrated?
Can I go with the ones that disappointed me? Because I doubt I own any blush most people are bragging about (like high end blushes and similar). Very disappointing blushes for me were Maybelline 201 that looks horrible on me and Yves Rocher Taint Clair Rose which is so light that's barely visible on my skin. I could probably add Essence blushes from recent limited edition collection Like an Unforgettable Kiss here as well, because they weren’t that nicely pigmented as usually their blushes from LE collections are.

Most underrated?
Nothing comes on my mind, sorry.


Worth the hype?
Here I'd say Catrice Defining blushes and Sleek blushes. Both brands have amazing brushes that are great pigmented and last for hours on cheeks. Favourite from Catrice is Mandy-rine and from Sleek Pomegranate. 

Top 5 blushes everyone should own?
Okay, this question is hard. I mostly own drugstore blushes and some of my favourite are from limited edition collections, so I guess I have to exclude those here. I'm going to name 5 of my favourites that are still available: Catrice Mandy-rine, Catrice Coral Me Maybe, Sleek Pomegranate, Sleek Rose Gold and Maybelline 501. 

What blushes are on your WL?
Mac blushes, of course. In December I was in Graz, standing before Mac stand with blushes and there were so many interesting shades that I couldn't decide which one to get. Because they aren’t the cheapest I didn’t want to buy just one shade, came home and discover I don’t like it. Next time I have to do a research before going to the shop, because this time I was more focused on lipsticks.

Final thoughts?
I love blushes, haha. :P Anyway, I know my answers are not the most interesting to read, but it was a fun tag to do. I'd like to tag Mateja, who told me about this tag, Sara, Sanjaand Petra. Of course, anyone else is welcome to do it as well. 

Thank you for reading!

How I Photograph My Makeup Looks

$
0
0
I often get asked how I take my makeup photos, how do I do my selfies, which camera do I use etc. Well, today I decided to share with you few tips and tricks I learned since I started posting makeup looks on my blog. I just want to make clear that I’m not a professional photographer and I don’t know that much about photography. What I’m going to tell you today are things that I learned in last few years and that work for me.

Which camera do I use?
The camera I use is Nikon Coolpix S3300. I received it few years ago as a gift for Christmas and it serves me well since then. It makes good photos, and because it’s small it’s easy to hold in hand. Two years ago I also purchased a tripod, which I use very rarely, because I take most of my photos outside on my balcony, where it’s impossible to use it.


When and where I take my photos?
Whomever you’re going to ask how and when to take photos of your makeup they are going to tell you in the morning or afternoon, but never in direct sun light. I always photograph my makeup in the forenoon, because my room is on west and in the morning the sun is never shining in my room and on my balcony. In the past I took few makeup photos in my room, but photos were always so blue and I never liked them, so later I discovered that if I take them on my balcony in the forenoon they look the best. My background looks grey, but that’s because we don’t have a facade, only an insulating layer. I was thinking to put a white paper on a wall, but people are already looking me strange when I take my photos outside, what even if I’d have a special background, haha. :D But that’s one of the things that comes with blogging and I got use to it. Sometimes when I see a bigger group of people or acquaintances I get in my room and when they pass our house I go back again. I do that because I really don’t want to get asked what am I doing and then explaining everything. The most annoying thing that can happen by taking photos outside is the wind. And that happens often. If the wind isn’t strong it’s okay, but when it’s very strong I can’t take a proper photo, because my hair is all around me, in my mouth, in front of my face, and then I usually take a lot of bad photos. I personally don’t like taking photos in the evening under artificial light or with flash, because the light is too yellow and colours are often washed out.
To show you the difference between photos taken outside and in my room in front of a window I photographed the same look on both locations. As you can see photos taken inside look too blue.  I think it has something to do with my green walls. But telling the truth, I don’t want white walls, I like green ones, because green makes me happy.

Left: in front of the window inside. Right: outside in the shadow. 

How I take my photos?
My camera is small and light, so I always hold it in my hand. If I photograph my whole face I hold in so far away that my hand is almost straight, but when I photograph my eye makeup I hold it closer. With time I learned how I have to hold my camera to get my whole face on photo, but if you’re just starting help yourself with a mirror. Try different angles to discover which photos of your makeup are the best. If you’re having a small camera like I hold it in one hand and a mirror in other. If you’re having DSLR camera you’ll probably need a tripod. A tripod is also a good solution if your hands are very shaky. That way you’ll get clear photos.
When I photograph my full face I never use a macro mode, because it makes my photos blurry (remember, I take photos from far away). But when I photograph my eyes I always turn on the macro mode so my photos end up clear. I always take a lot of photos, definitely something between 100 and 200. I take as much photos as possible, just in case, because it often happens that photos are out of focus or I have hair on my face and similar. 
During the photo shoot process I always check on photos I already took. That way I see if any of photos end up blurry, how I look on them, if my posses are okay, what I have to fix (I often hold chin up while taking photos and then I try to hold my head straight).
Other question I often get asked is how I take such good photos of my eye. Always when I photograph my eye or myself looking straight I lift my eyebrows up. That way colours on my lids are better seen. Also, when you focus on eye look taking a photo of an eye while looking down is always a good idea, because that way you can show your readers the party that’s going on on lids. I often take photos of my eye makeup when I’m looking down, although not always.


How I edit my photos?
For editing I use GIMP (GNU Image Manipulation Program). GIMP is a free program for editing and it’s very easy to use. It’s true I don’t master it completely, but functions I need for editing are simple to learn.
Usually I don’t do anything special while editing my makeup photos. I check every photo I took and choose the ones I like the best. I open them in GIMP, crop them, sometimes I fix the light if photo seems too dark and then I save them. That’s it. I crop photos because I usually don’t get on a photo only that what I want to show you, but more. I never photograph just my eye for a close-up eye photo, but always a half on my face as well, and that needs to be cut out. First I use a tool “Rectange select tool” and I mark the surface I want to keep. Then I click on “Image” and “Crop to selection” and my photo is ready. In the end I always export photo (“File” and “Export as”) to save it as .jpg or .png, because if I click “Save as” it saves it in .xcf form.


Summary:
  • Natural lightis amazing for taking photos. I usually do it early in the forenoon, because then photos look the best. I don’t use a flash and I don’t like taking photos under artificial light, because it makes photos too yellow and colours are often washed out.
  • Avoid the direct sunlight, because it will make you look yellow. If you’re taking photos outside, make sure you take them in a shadow and inside take them in front of the window in indirect sunlight. The better daylight you have in your room the better photos will look. Mine personally look too blue, but some other bloggers do perfect photos of their makeup inside.
  • The background should be as simple as possible, because you want all the focus on makeup, not on what’s in the background. Mine looks grey, but it’s simple and it doesn’t bother me.
  • If your hand is too shaky use a tripod. That way your photos won’t end up too blurry.
  • If you want to know what you’re photographing use a mirror. If you can’t hold a camera and a mirror in hands at the same time, use a tripod for a camera. Or if you’re taking photos inside, place a mirror on a table or a chair in front of you (you’ll probably have to sit on the floor to take photos).
  • If you want to show your entire makeup photograph your whole face and if you want to show your eye makeup hold a camera as close as possible and focus on eye. When photographing your eye makeup turn the macro mode option on, otherwise the camera won’t focus on eye and your photos will end up blurry.
  • For editing photos use any photo editor you like. I personally use GIMP, which is a free photo editor and it’s simple to use. Select the photo you want to publish and crop out the contest you want to show to your followers.
  • Practise makes perfect. Practise and try different angles and poses to figure out which one works best for you. You can practise in front of a mirror before taking photos. After some time when you’re going to learn what works the best for you, taking photos of your makeup will become a piece of cake for you.

I hope this post was helpful. If I forgot to mention something and you have something to add, just tell me and my readers in the comments bellow.


How do you photograph your makeup? Thank you for reading!

Review: Nanshy Marvel 4in1 Makeup Blending Sponge

$
0
0
There are few makeup tools for applying foundation, but for achieving a natural look there’s no better tool than a makeup sponge. I haven’t try them many – I have one cheap from Tedi, one from Ebelin I bought back in December in Austria and Nanshy Marvel 4 in 1 Makeup Blending Sponge that I’m going to review today. 


Nanshy is a new brand in Slovenian market and they offer makeup tools. One of them is a makeup sponge that comes in a mint colour, which is very exciting for me who loves all shades of green and doesn’t adore pink colour in which most of makeup sponges are. Most of makeup sponges are shaped like an egg with straight surface, but Nanshy has a special shape. It’s wider on the bottom andon the topand narrower in the middle. The middle part is narrow so that you can easier hold the sponge in your hand. One part on the top is flat and that enables you to reach and blend the foundation or the concealer in smaller and hard to reach areas. 


Nanshy sponge is very soft, if I compare it to Ebelin and Tedi sponges, and it’s also bigger. Tedi and Ebelin sponges keep the shape when I damp them, but Nanshy expands. You have to damp the sponge for smoother application. The application of a foundation with damp sponge gives a nice, natural look to the face, but I use up more foundation when I apply it with a sponge as I do when I apply it with a brush. That’s probably because the sponge soaks up some foundation during application. The sponge applies and blends the foundation perfectly and what I love about it is that there aren’t any visible brush strokes. It’s also easy to build up a foundation with it without getting a cakey look. I usually use the flat part to blend the foundation around my nose and the concealer under my eyes. When I use sponges I always stick to the tapping method; I think that because of this method foundation sets better on my skin. 

I recommend washing the sponge after every usage. It soaks up the product every time you use it and if you use it few times it also takes more time to clean it (not to mention bacteria that starts to collect on the sponge). For cleaning I always use a hard soap, because it cleans it better than a shampoo. I hold it under the pipe and squeeze it for so long that the clean water comes out. After that I know the sponge is clean. But no matter how much I clean it the foundation always leaves the marks on the sponge. I use it for quite some time now and I have washed it many times. The sponge still looks great, except of the top that is frayed a bit. 


If you use makeup sponges to apply your foundation you’re going to love Nanshy Marves sponge, because it really works great. You can get it on Click2Chic for 7,49 €and on Nanshy official site for £5,95. 

Have you tried anything from Nanshy? How do you like their products? Thank you for reading!

Slovensko besedilo:
Podlago lahko na obraz nanašamo s prsti, raznoraznimi čopiči in gobicami, ampak naraven videz podlage najlažje dosežemo s slednjimi. Sama jih nisem preizkusila veliko, samo 3. Eno imam iz Tedija, lani sem v Avstriji kupila Ebelinovo, pred kratkim pa sem prejela Nanshy Marvel 4 v 1 gobico, ki jo bom ocenila danes.

Nanshy je znamka, ki se je na slovenskem tržišču pojavila šele pred kratkim, ponujajo pa čopiče in gobice za nanos ličil. Ker sama obožujem vse odtenke zelene barve, sem prav navdušena nad barvo gobice, saj je mint barve in ne roza, kot večina gobic. Tudi njen izgled je drugačen, saj njena jajčasta oblika ni ravna kot pri ostalih gobicah, ampak je spodaj in zgoraj širša, na sredini pa ožja. Prednost ožje sredine je v lažjem držanju gobice med nanosom podlage ali korektorja. Še ena posebnost pri obliki pa je to, da je gobica na vrhu na eni strani ravno prirezana. Ta del omogoča lahek nanos izdelka na težje dostopna mesta, kot je npr. področje okrog nosu, in lažje blendanje izdelka na področju okrog oči.   

Gobica Nanshy je zelo mehka na dotik, dosti bolj kot Ebelinova in Tedijeva, poleg tega pa je večja. Ne Ebelinova ne Tedijeva gobica ne spremenita velikosti, ko ju namočim pod vodo, Nanshyeva pa postane večja. Nanos podlage z mokro gobico ustvari lep in naraven izgled, primeren je pa predvsem za dekleta s suho kožo, saj suhi predeli na ta način sploh ne bodo poudarjeni. Negativna stran gobic je dejstvo, da vpijejo kar nekaj izdelka in Nanshy gobica ni izjema, tako da pri nanosu z gobico vedno porabim več podlage, kot če jo nanašam s čopičem. Je pa njena prednost, da ni vidnih sledi čopiča; kar se tiče blendanja in nanosa, pa odlično opravi delo. Ponavadi stisnem nekaj kapljic podlage na zgornji del roke in jo nanesem na kožo s spodnjim širokim delom, potem pa s ploščatim delom tapkam po obrazu, da se podlaga lepo zlije s kožo. Zgornji ploščati del uporabim tudi za blendanje korektorja pod očmi.

Ker pri enem nanosu ponavadi umažem celo gobico in ker se želim izogniti nabiranju bakterij, gobico perem po vsaki uporabi. Na ta način jo je tudi lažje očistiti, saj vpije kar nekaj podlage. Perem jo s trdim milom, in sicer tako, da jo namilim, potem pa jo močim pod vodo in ožemam, dokler iz nje ne priteče čista voda. Takrat vem, da je gobica očiščena. Kljub pogostemu čiščenju na gobici ostajo sledi podlage, ki se ne dajo odstraniti, vendar pa je obdržala obliko in tudi trpežnost, edino konica je malce obrabljena, kar dokazuje, da je gobica res kvalitetno narejena. 

Če obožujete gobice za nanos podlage, bo ta več kot primerna za vas. Dobite jo v spletni trgovini Click2Chic za 7,49 €

Ste že preizkusile Nanshy izdelke? Kaj menite o njih? Hvala za pozornost!

*PR product

Review and Swatches: Artistry Exact Fit Cream Powder

$
0
0
Because I have a normal skin I never devoted too much attention to powders because almost everyone works for me. As long as my skin doesn’t look cakey I’m okay with that. But when I started to use Artistry Exact Fit powder in the shade Cream I discovered that a quality powder can make a big difference is someone’s foundation routine. My skin has never looked as great as it does since I included this powder in my routine.


Artistry is a brand that offers makeup and skin care products. Their products are not the cheapest so I expected a lot from their powder. And it didn’t disappoint me. The packaging is quite luxurious. The lid is golden with a big A letter on the top and inside you get a powder and a sponge for applying powder, but I never used it (I’m pretty satisfied with my Ebelin brush). The big letter A is also engraved on the powder. By the mail the packaging, powder (refill) and sponge came packed separately in cute black bags. Then I put the refill into the packaging myself. Inside there’s a mirror, which is always handy for applying powder or re-touching your makeup during the day. The packaging is very quality made and it won’t brake easily. Because it’s not too big it’s great for carrying around in purse or for travelling.   


I got the shade Cream (although I ashed Bisque), which is a light warm shade. This powder has a very good coverage and it’s a good match for my skin tone. I especially love to use it when I’m doing bolder looks, because together with my foundation it gives my skin such a nice coverage and it covers every imperfection, so that my skin looks flawless. It looks very natural on the skin and it doesn’t emphasize any dry parts. It prolongs the duration of my foundation and even after 8, 9 hours my skin still looks amazing. This powder also has SPF 20. It matiffies the skin, but after few hours I can notice a shine on my forehead. I have a normal skin and that shine is usually very gentle, but I can’t say how it would work on oily or combination skin.


Artistry Exact Fit powder exist in 8 shades and in all tones (if you want to know which shade matches your skin tone the best, check out their page, where everything is very well explained). You get 12 g of a product for 49,61 €. You can also buy the packaging (23,50 €) and the refill (29,77 €) separately. I do love this powder because of the natural and flawless effect it gives to my skin, but I probably wouldn’t purchase it myself, because I find it too expensive for my budget. 12 g is a lot of product and although I set myself a goal to hit the pan on it till the end of the year, I doubt I bit I’ll manage to do that because I use it with every look I do for few months now and I used it only a bit (if you don’t know what I’m talking about, click here).

More looks of me wearing this powder here.


Have you tried Artistry products? What do you think about this powder? Thank you for reading!
*PR product

My Blush Collection

$
0
0
I admit I'm obsessed with blushes. There was a time when I didn’t use blushes, because I thought I don’t need them, but when I discovered how gorgeously they define my face I felt in love and start buying them like crazy. Today I decided to show you my blush collection. I was actually preparing this post for months now, but taking photos and editing took me so much time that I needed a little break in between. :P Most of my blushes are from drugstore and probably a half of them are from limited edition collection, so this won’t be a long post of reviews, but not so short preview of my collection with information if these blushes are still available and where you can get them. 


This is a light pink shade with a very strong shimmer that isn’t overwhelming on the face, it rather gives it a glow. Its pigmentation it’s good, but it’s not the most long lasting blush. It’s available in Müller.
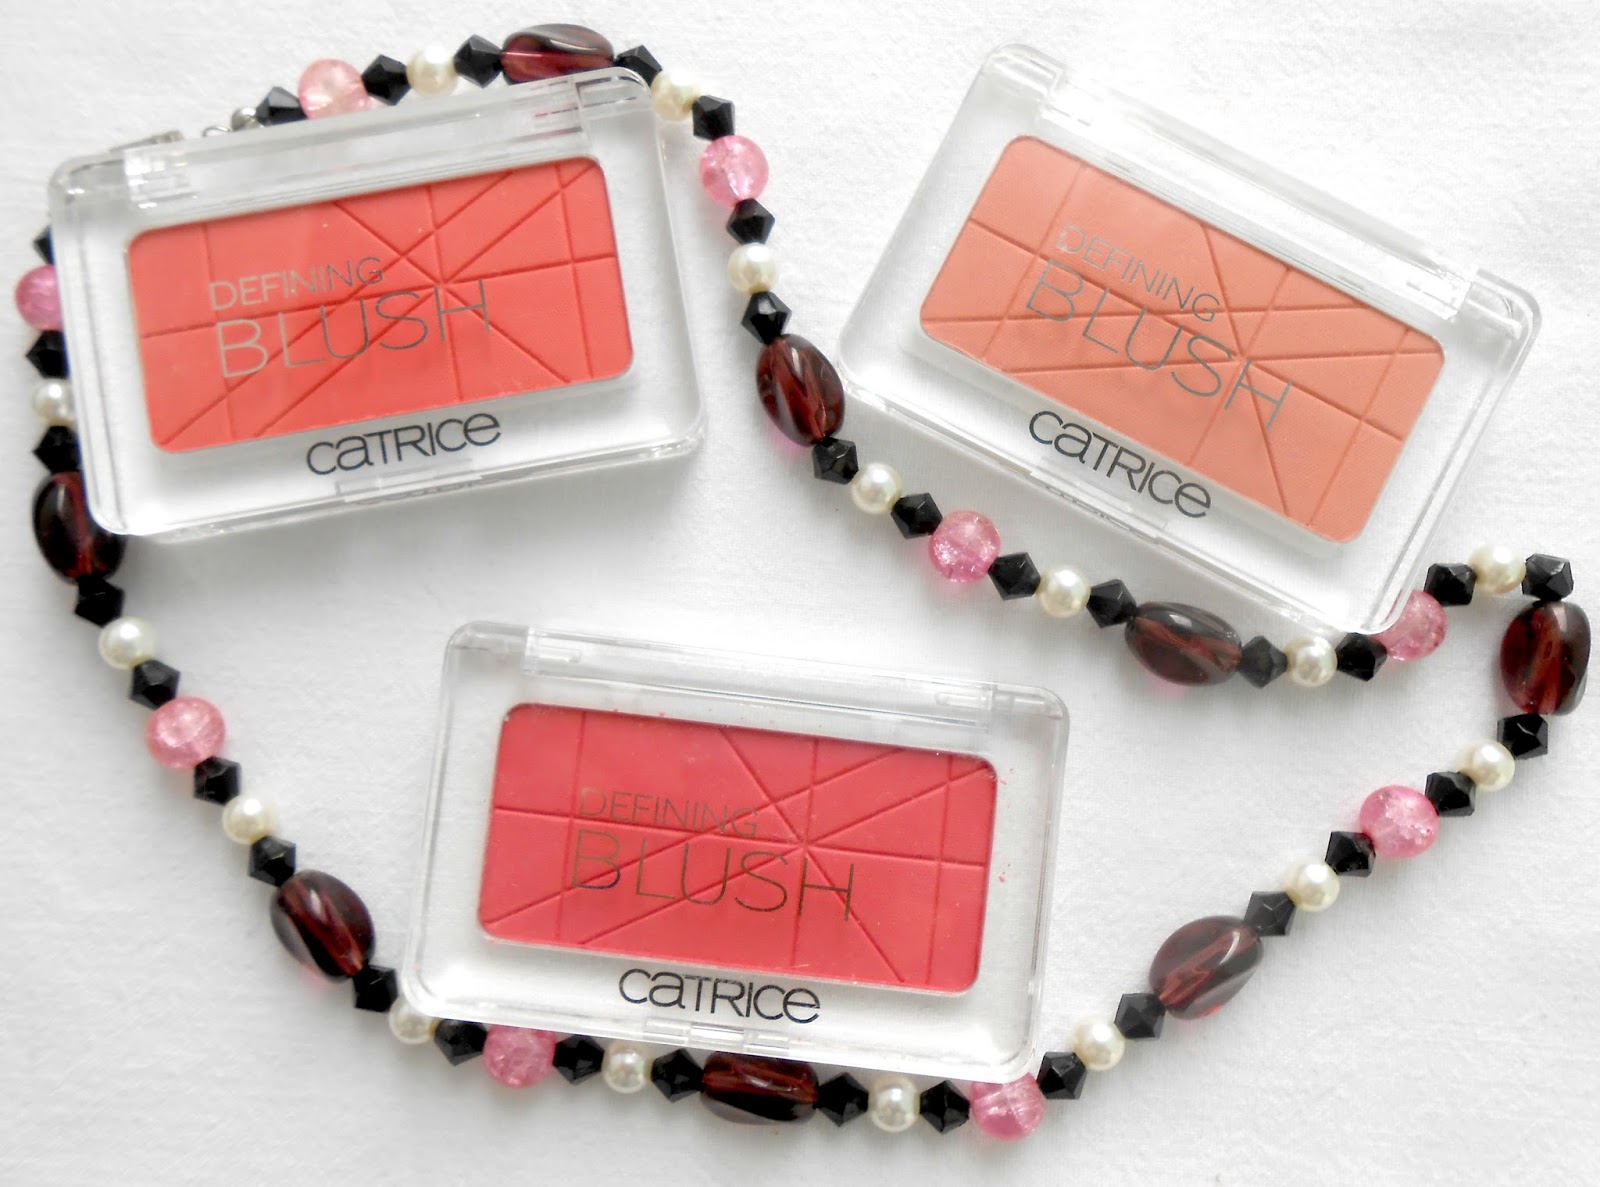
Catrice Pinkerbell
Pinkebell is my favourite pink blush. It’s from Catrice’s collection Defining blushes and it’s still available (you can get it in Müller). It’s amazingly pigmented, so I have to apply it gently to achieve a nice look, it blends nicely and it gives a matte finish to the face.

Mission Flower is a hot pink shade that has a creamy finish, but during application it changes into a powdery one. It’s nicely pigmented and easy to blend, and despite its strong colour it looks natural on skin. It was a part of Essence Guerilla Gardening TE.


Yves Rocher Taint Clair Rose
Taint Clair Rose is a very gentle rosy blush with a matte finish. I have to say I was very disappointed by this one, because it’s badly pigmented. It’s buildable, but appropriate only for fair people. It also doesn’t last very long on me. It’s available at Yves Rocher store.

Before Catrice released Defining blushes of only one shade they had Defining duo blushes with two shades. Pink Grapefruit Cake gives a pinky-coral colour if we mix both its shades together and it’s really a nice silky, pigmented blush. Its finish is matte. It’s discontinued.

Flormar Blush-On 89
I have a confession to make. I haven’t worn this blush on my cheeks yet. I don’t know why, because it’s a pretty pink matte shade with an amazing pigmentation. In Slovenia Flormar is sold in Supernova in Ljubljana.


Prima Ballerina is a perfect shade for summer due to its creamy texture that’s easy and quick to apply and blend on skin with fingers. It’s a pink matte shade and blended on skin looks quite natural. It was a part of Essence Ballerina Backstage collection.

Makeup Revolution Vivid Blush Lacquer O’Boy
I only have one blush from Makeup Revolution, but I’m impressed. This is a pink matte creamy blush and its pigmentation amazed me. I need only a tiny bit of product to achieve a nice looking colour on my face and it stains which prolongs its duration. It’s available on Ličila.si.

MUA Shade 1
This is a bright matte pink shade with powdery texture. Its pigmentation is good, although not as amazing as by some other blushes. I don’t think it’s still available in Slovenia, but in the past it was sold on Ličila.si.


Catrice Defining blush Think Pink
Think Pink is a shade that I got because of Mateja’s review. It’s a gorgeous coral-pink shade with great pigmentation and it gives a matte look to the skin. Catrice Defining blushes have a very silky formula and are easy to blend. It’s available in Müller and maybe at DM and Tuš drugstore, too (I actually haven’t check Catrice stand in those stores properly yet).

Bed of Flowers is a dark fuchsia creamy blush that looks more pinkish on cheeks. Its pigmentation is not the best, but it’s buildable. It was a part of Catrice Eve in Bloom limited edition collection.

Candy Pink is a matte pink shade with nice pigmentation. Unfortunately it isn’t available anywhere in Slovenia, I got it in a swap from Serbia.


Sleek Pomegranate
I adore Sleek blushes and this one is my favourite. It’s a berry shimmery shade with amazing pigmentation. I need to touch it with a brush only a bit and it already gives a colour to my cheeks. The most amazes me the duration time. This blush last up to 10 hours on my cheeks – it depends how strong I apply it. I bought it at Mojadrogerija.si.

This is a dark burgundy red shimmery shade that looses the intention on cheeks and gets more pinkish undertone. Its pigmentation is amazing and it’s definitely one of the most amazing and my favourite drugstore blushes. It’s available in Müller.

Shy Pink is a darker pink shade with golden shimmer. It’s a nice blush, but completely neglected and unused. I think Fleur de Sante isn’t available in Slovenia anymore (correct me if I’m wrong).


If I neglect not so pretty packaging, this blush is an okay drugstore product. It’s a reddish pink shimmery shade with an okay pigmentation, but buildable. I bought it on sale last year, and I’m not sure if it’s discontinued or not, but S-he Stylezone brand is available at DM.

This is a reddish coral shade with an okay pigmentation. It was a part of Catrice Hollywood Fabulous 40ties limited edition collection.

Rose is one of my first blushes, and I love it, but when my collection started to grow I completely neglected it. It’s a rosy matte shade with a good pigmentation and it looks gorgeous on skin. It was part of Mademoiselle limited edition collection that had the most gorgeous packaging.


Renesmee Red is a dark red matte shade and it’s quite unique. Luckily it doesn’t look horrible on me, but I don’t use it much, because red blushes are not really my favourite to wear. It was a part of Essence Breaking Dawn TE collection.

This is a bright red matte shade that’s quite sheer, but buildable. It was a part of Catrice Glamazona limited edition collection.


Sleek Life’s a Peach
No matter if it’s shimmery or matte Sleek knows how to make a great blush. Life’s a Peach is a matte shade that isn’t as pigmented as Pomegranate, but still enough to give a colour to the face quickly. I got it at Moja drogerija.

East Side Story is an orange good pigmented blush with tiny shimmer that isn’t too noticeable on the face. It was a part of Essence Kalinka TE collection.

Peach Punk is a vivid peachy-orange creamy shade. It was a part of Essence Rebels TE collection.


Sleek Rose Gold
Rose Gold is a blush that you love or hate. I personally adore it. It’s a peachy shade with golden shimmer and it’s an amazing shade to use in summer on tanned skin, because it gives it such a gorgeous glow. Like Pomegranate it’s amazingly pigmented and lasts on me for ages. I bought it on Mojadrogerija.si.

I still remember the fuzz that was going on when this blush came out. The gradient effect of this blush made everyone excited and I wasn’t the exception. It’s really a great blush. It has a matte finish and a great pigmentation. All colours together give a nice coral shade, which is one of my favourite shades to wear on cheeks. This blush was a part of Essence Miami Roller TE collection, but last year they released it again in their permanent assortment.

Catrice Defining blush Love&Peach
Another blush from amazing Catrice Defining blush collection. Love&Peach is a vivid peach matte shade. As other blushes from this range it’s silky, easy to apply and blend and I also must not forget the great duration time on my skin. It’s available in Müller.


Catrice Defining blush Mandy-rine
Mandy-rine is my all time favourite blush. It’s a gentle peachy matte shade with good pigmentation and silky texture that makes it easy to apply and blend on cheeks. I really adore the natural effect it gives to my skin and the fact that I can combine it with any look I want and it won’t look overwhelming on my face.  It’s available in Müller.

This is another of old Catrice duo blushes that’s discontinued. It’s a gentle peachy shade with tiny shimmer.

Essence Natural Beauty
Natural Beauty is a brownish shade that contains tiny shimmer. Its formula is very silky and the pigmentation very good. Applied on the skin it doesn’t look brown, but it gives it such a natural looking effect. The shimmer is also noticeable, so highlighter is not required. It’s available in stores that sell Essence products. 


Coral Me Maybe is a coral shimmery shade that’s not very pigmented, but it’s buildable on cheeks and easy blendable. It’s available in Müller.

Grapefruit Jelly is a light pink matte shade with really amazing silky texture. Its pigmentation is not the best, but it’s buildable. In Slovenia you can get it in online store Destination Pretty.

Essence Soo Blush! Sweet as a Peach
Sweet as a Peach is a peach creamy shade with a great pigmentation. I noticed that it doesn’t last that long on my skin if I don’t set it with powder blush, but it’ll be perfect to use in summer for a nice glowy skin look. It’s available in all drugstores that sell Essence. 


Ap-ri(c)ot is is on a list of my favourite blushes. It’s a coral matte blush with a good pigmentation. It gives such a fresh look to my face and it’s easy to build up if I want to achieve stronger look. It was part of Essence Be Loud TE collection.

Asian Sensations is a duo blush that gives a peachy-coral look to the cheeks. It’s very silky, pigmented and easy blendable. It was part of Essence Cherry Blossom TE collection.

It’s Popul-art had one of the prettiest designs Essence ever made. It’s a peachy-coral shade with not the best pigmentation, but it’s buildable. It was part of Essence Vintage District TE collection. 


This is a peachy-coral matte shade from Catrice San Francisco palette that was a part of Big City Life limited edition collection.

This is a plum matte shade from Catrice San Francisco palette.

This is a pink matte blush from Paris palette that was a part of Catrice Big City Life limited edition collection.

This is a peachy matte blush from Paris palette. 


Explosion is a peachy-coral shade with an amazing colour payoff and a matte finish. In Slovenia you can get it in online store Glossy.si.

Pink Me is a pink matte duo blush with not very good pigmentation from this year’s Essence TE Like an Unforgettable Kiss.

From the same Essence TE Like an Unforgettable Kiss I also got Nothing but Lovestoned that is a peachy matte shade with the same poor pigmentation as Pink Me. 


I hope you successfully came through this post. It was long, but I hope that it was interesting. If you follow me on social media, you may have or may have not notice that there’s one blush missing. Recently I received a Mememe Blush Box Rouge. Because I already had everything prepared for this post (photos were taken and edited) I didn’t include it, but in a week or two (or three) there will be its review on my blog.


Tell me, how many blushes there are in your collection and which ones are your favourite. Thank you for reading!

NOTD: The Coral Spring

$
0
0
After such a long post as yesterday’s My Blush Collection was I was in a mood for something shorter today. I haven’t posted any nail art for a while, and recently I wore one very interesting, spring inspired manicure that actually wasn’t a stamping manicure, but a free-hand one. Polishes I used for this manicure are S-he Stylezone 115, Essence Off to Miami, Essence Makes Me Weakand Born Pretty Store golden stamping polish. I also made a tutorial. 


Tutorial:
Step 1: Apply a base coat to protect your nails. Then use 2 coats of a white nail polish.
Step 2: When white polish dries a bit, apply a coral shade on a half of the nail. Application doesn’t need to be perfect, because we’re going to do a line in the middle of a nail.
Step 3: Use a golden nail polish and draw a line between both shades.
Step 4: Use a coral nail polish and a dotting tool do draw few bigger dots on a side where white nail polish is.
Step 5: Use a brighter coral/peachy shade and draw thin lines into the dot. That way we’re going to get flowers.
Step 6: Do few golden dots around flowers.
Step 7: When everything we use dries a bit, use a top coat to seal your manicure. 


I hope you like this manicure. Thank you for reading!

Review: The Body Shop Vanilla Brulee Products

$
0
0
Back in December when I visited Graz I got a lot of recommendations to visit The Body Shop store in the center of Graz. Everybody loves this brand and I was curious what’s so special about it. Stores in the center of Graz are very small, and in that festive season there were a lot of people doing shopping, so you can imagine that it was crowded in the store when I visited it. I barely manage to check out the half of the things they had in the store, what even to decide what I want to buy. In the end I decided for few holiday sets with testers, and the scent I got is vanilla. The Body Shop products have very strong scent and I was searching for something that would smell pleasant to me. Vanilla Brulee products were part of Christmas collection last year.

I got a shower gel, soap, body butter and a hand cream. Body butter, soap and shower gel are testers, while a hand cream is a full size product. I’m going to review each product separately and tell you, what I think about them.


Vanilla Brulee shower gel
Shower gel comes in a mini 60 ml version, while full size contains 250 ml. It’s dense and creamy product that foams nicely on the skin and it smells divine. I had this bottle for few usages, but I don’t remember anymore how many. This product leaves the skin very soft, although I can’t say it moisturizes it, but it also doesn’t dry it out. After the showering it also leaves the gentle vanilla scent on the skin that disappears after a while. 


Vanilla Brulee hand cream
The hand cream was the product I was most excited about, but it left me cold. The texture of a cream is very light and it soaks into the skin very fast. It doesn’t leave the greasy feeling on the skin, but it does leave the strong vanilla scent that last for ages. What doesn’t last on my skin is the feeling of moisturized hands. I have a feeling that my hands become dry fast, and if I apply it before going to bed I wake up with dry hands in the morning. I’m surprised that the scent lasts so long on hands, but the feeling of moisturized hands disappears faster. The hand cream contains 30 ml and it costs 9 €. Maybe this cream would work better for me in the summer when my hands aren’t that dry. 

Vanilla Brulee soap
This is the cutest soap I ever saw. It’s in the shape of a heart and I think these are limited edition soaps, because I don’t find them on TBS site to tell you how much product I actually got. This soap was very creamy and it foamed amazingly, but it dried the skin anyway as all soaps usually do. It also contained small dots of vanilla that you could feel between your hands while you were rubbing the soap. I think this was a very good soap that cleaned my skin nicely and it also leaved a gentle vanilla scent on it. 


Vanilla Brulee body butter
The body butter has a thick consistency and it takes a bit more time to rub it into the skin, but it moistures and nourishes the skin, not to mention the amazing scent that it leaves on it. The mini version contains 50 ml, while full size contains 200 ml, but I have to say 50 ml is enough for me, because using body butters and lotions is the step in body care that I often skip. If the hand cream didn’t impress me, I love body butter which moisturizes my skin for hours and also the scent stays on for quite some time. I usually apply it in the evening before going to sleep and in the morning I wake up with soft and silky skin. 


I have to admit I wasn’t as impressed as I expected to be considering the hype The Body Shop products are getting. I was really disappointed with the hand cream. It’s an okay product for people with not so dry hands, but since it was released as a part of Christmas collection, and the weather is cold outside during holidays season (it’s winter after all), I’d expect for it to be more moisturizing. Also, I find shower gel quite average. However, I did like the soap and the body butter is quite amazing. If I’d repurchase this collection I’d do so because of a scent, since this one really is amazing.

Which TBS have you used and you'd recommend them to try? Thank you for reading! 

Products That Disappointed Me #5 (Products for Lashes)

$
0
0
Today I’m going to write about three products for lashes that left me cold. When I see the word “volume” on the packaging I immediately expect a volume when I put this product on my lashes, but when I don’t get it this product goes immediately in my disappointing products basket.

 Essence Lash Base mascara

Essence released white base mascara that should give an intense volume and length to the lashes. Its formula is creamy and mascara is very well pigmented, which means that it covers lashes completely, even if they are very dark. After you apply white base you need to apply the mascara immediately on the top, before the base dries. The white colour of this base mascara is so strong that it’s hard to cover. It takes ages to apply the black mascara over it so that the white colour isn’t visible anymore. I disagree that this mascara would help reaching an intense volume, but it helps by lengthening and it separates lashes perfectly, so it works great with those mascaras that usually stick lashes together. In the packaging there’s 9 g of products and it costs around 3 €. I like to use it when I want that my lashes will look more separates, but otherwise I don’t think it adds much to the volume and it bothers me that’s not the easiest to cover.


On my right eye I first used Essence Lash Base mascara and then I applied Essence Lash Princess mascara as I would normally apply it. On my left eye I used Essence Lash Princess mascara alone. I wanted to see if there's any difference in the volume, but I can't see it. Otherwise Lash Princess mascara is very voluminous on its own.


Catrice Lash Boost Lash Extension Fibres

I have no idea why I bought this product because fibres and I don’t go well together. I tolerate them in mascaras, but not separately. As Essence base mascara this one should also help achieving voluminous and longer lashes. I use it the way that I first apply mascara, then fibres and then I go over the lashes with another coat of mascara. I also tried the way that I first applied fibres and then mascara, but they didn’t stick well on my dry lashes.
For this post I intentionally chose mascara that doesn’t give much volume to show you that these fibres do nothing for me. It’s like I wouldn’t even apply them, but I did, because the feeling is very unpleasant when I use them. It’s like I would have something in my eye that would poke me all the time. And I don’t even wear contact lenses (this product is not suitable for people who wear contact lenses). You get 0,8 g fibres for around 4 €, but for me this is a thrown away money. I did saw on few blogs that this product worked for some ladies, but unfortunately it didn’t work for me.


Catrice Lash Extension Volume Mascara

As I said at the beginning, if it says volume on the packaging I expect volume on my lashes as well. Well, this mascara doesn’t do what it promises. It’s actually written on the packaging: “Deep black volume mascara with integrated fibre extension for an ultimate lash extension effect.” I should have learned by now that Catrice can’t compete with Essence in doing a great mascara, because Essence wins this fight without a doubt. The brush of the mascara is small, so it enables an easy application and one can easily reach lashes in inner part of the eye as well. Fibres are barely visible and if I wouldn’t read the writing on the packaging, I wouldn’t even notice them. Mascara does give a nice black colour to the lashes, but no volume and a bit of length. I have no idea what’s with fibres and my lashes, but fibres don’t seem work on them (except if I’m doing something wrong). Although I opened this mascara three of four months ago it’s still pretty wet and if I don’t wipe the access product off it sticks my lashes together. For me this mascara is good for a day, when I want to achieve a natural look with a bit of colour on my lashes, but the problem is that I rarely want to achieve that look, I’m more of a “big voluminous lashes” girl. I regret that I didn’t add it into my giveaway few months ago when I received Catrice package on the event, because maybe someone else would like it better. Mascara contains 9 ml and it costs around 4 €. I personally am not a fan and would not recommend it if you expect a volume from it. 


Have you tried any of these three products? How are you satisfied with them? Thank you for reading!

Review and Swatches: S-he Stylezone Eyeshadow Quattro 245

$
0
0
S-he Stylezone is a brand that doesn’t really catch my eye when I visit DM. The main reason is their Lego style packaging, which doesn’t look attractive to me. Their old packaging was so much prettier. However, occasionally I buy their products and here and there some of them knock my socks off. One of these products is S-he Stylezone Eyeshadow Quattro 245. I think this palette is limited edition, but by S-he you never know because they don’t write it anywhere. 


Luckily this palette doesn’t have the typical S-he packaging – it is square, but the lid is straight, which makes is prettier and easier to store. Otherwise the packaging is small, which makes it perfect for carrying around. Well, that also depends from the shades. The palette I took is very colorful, which is the main reason that persuaded me to get it. Unfortunately the quantity isn’t written on the packaging. 


From my experience S-he eyeshadows are very fragile and they crumble quickly. Well, the story with these ones is completely different. They are very silky and soft, while they do dust and fall out during application. The color payoff is also amazing and they blend easily. While some, like purple, can blend so much that they lose the intensity, they are buildable (for example, on my first look purple eyeshadow looks very sheer, while on second very pigmented). Surprisingly, my favourite eyeshadow in this palette is the brown shade. It’s the creamiest and the most pigmented of the bunch. It’s also the only shimmery eyeshadow in the palette, while others have a matte finish and they contain glitter. What also surprised me is the acting on eyes. They didn’t crease on my eyes, they only faded a bit by the end of the day. For me this is really a perfect drugstore colorful palette, the only eyeshadow I’m missing is black (so I added a black eyeshadow from Sleek palette to the looks).


The price of this palette was around 3 of 4 €, I really don’t remember exactly. I always save the bills for products I want to review, so that I can check how much I paid, but when I actually review them the bill gets lost and I can’t find it – like in this case. Anyway, I like this palette a lot, it’s “me” palette and I find it much better quality as S-he eyeshadows usually are.

What do you think about this palette? Thank you for reading!

I Love... Cosmetics Vanilla&Almond Set (Giveaway)

$
0
0
I wrote aboutI Love… Cosmetics products before. This brand offers skin care products and after trying some of their shower gels I decided to try body butter as well. I bought a scent Vanilla&Almond in a set that contains body butter, shower gel and shower sponge. Last week there was an opening of the store Jager in Turnišče and they offer brands like I Love... Cosmetics, Afrodita and similar, which is quite convenient for me, because now I can just walk on foot to the store when I need some skin or hair care products, but for makeup I still need to drive to Murska Sobota. Anway, enough of my rambling, let’s talk about products now.


 Vanilla&Almond shower gel
The shower gel is a mini, 50 ml version. Unlike other I Love... Cosmetics shower gels this one is thicker and because of that easier to use during showering. It’s a shimmery shower gel and it foams really nicely. It smells more like an almond than vanilla to me, and its scent it very strong. At the beginning it was quite annoying to me, but with every usage I got more use to it and now I like it a lot. It’s not very nourishing, but it also doesn’t dry my skin. It leaves a gentle scent to it. The packaging is a cute mini plastic packaging, a copy of big ones. 


Vanilla&Almond body butter
I cannot help not to compare this body butter to The Body Shop one. This one is not as thick as TBS, but it also takes time to spread it over the skin and to rub it in. Once I do that the butter sinks fast and it doesn’t leave a greasy feeling, but moisturized and nourished skin. In the morning when I wake up my skin is soft and it still smells nicely. This one is also a mini version, it contains 50 ml. If I’d use it all over my body (legs, hands, back ...) it would be gone after 4 or 5 usages, but I usually use it only on my legs and hands, where I tend to have drier skin. It smells exactly the same as shower gel and I like it a lot, although I prefer TBS body butter a bit more. 


I bought this set in Jager for 3,99 €. I find it very affordable and I would repurchase it, but probably some other scent (like Raspberry Vanilla which smells so refreshing).

Now one of you lucky ladies will get a chance to win the same set in my giveaway by filling the Rafflecopters form. This giveaway is open one week from today, until 2. 5. 2015. It’s open only for Europe. Good luck to everyone!


a Rafflecopter giveaway
Have you tried any of I Love... Cosmetics sets? Which products would you recommend me?
Viewing all 399 articles
Browse latest View live